26 December 2022

Santa's Bowl

 Happy Christmas Everyone, I hope you're having a wonderful time. 

My make today is one I included in presents for the family. Although they were filled with sweets and chocolates.

I couldn't get over how deep and big they were, AND, I made them smaller than they should have been. They are about 7 inches (ca. 18 cm) wide and about 2.5 inches (6.35 cm) deep, they stand about 5 inches (ca. 13 cm) tall. I have to admit the first one took ages watching the tutorial video, the other 2 went together quite quickly.

I cut them with my digital die cutting machine, so handy for homemade presents. This post was delayed posting, as they were presents and my SiL reads my blog, I didn't want her to see the shared pressie before she opened hers and my brothers. 

 Santa Bowl - Simply Crafty SVG's
all card - stash
 
a group photo hahaha
 
  an individual photo

inside the bowl


23 December 2022

Framed gift!

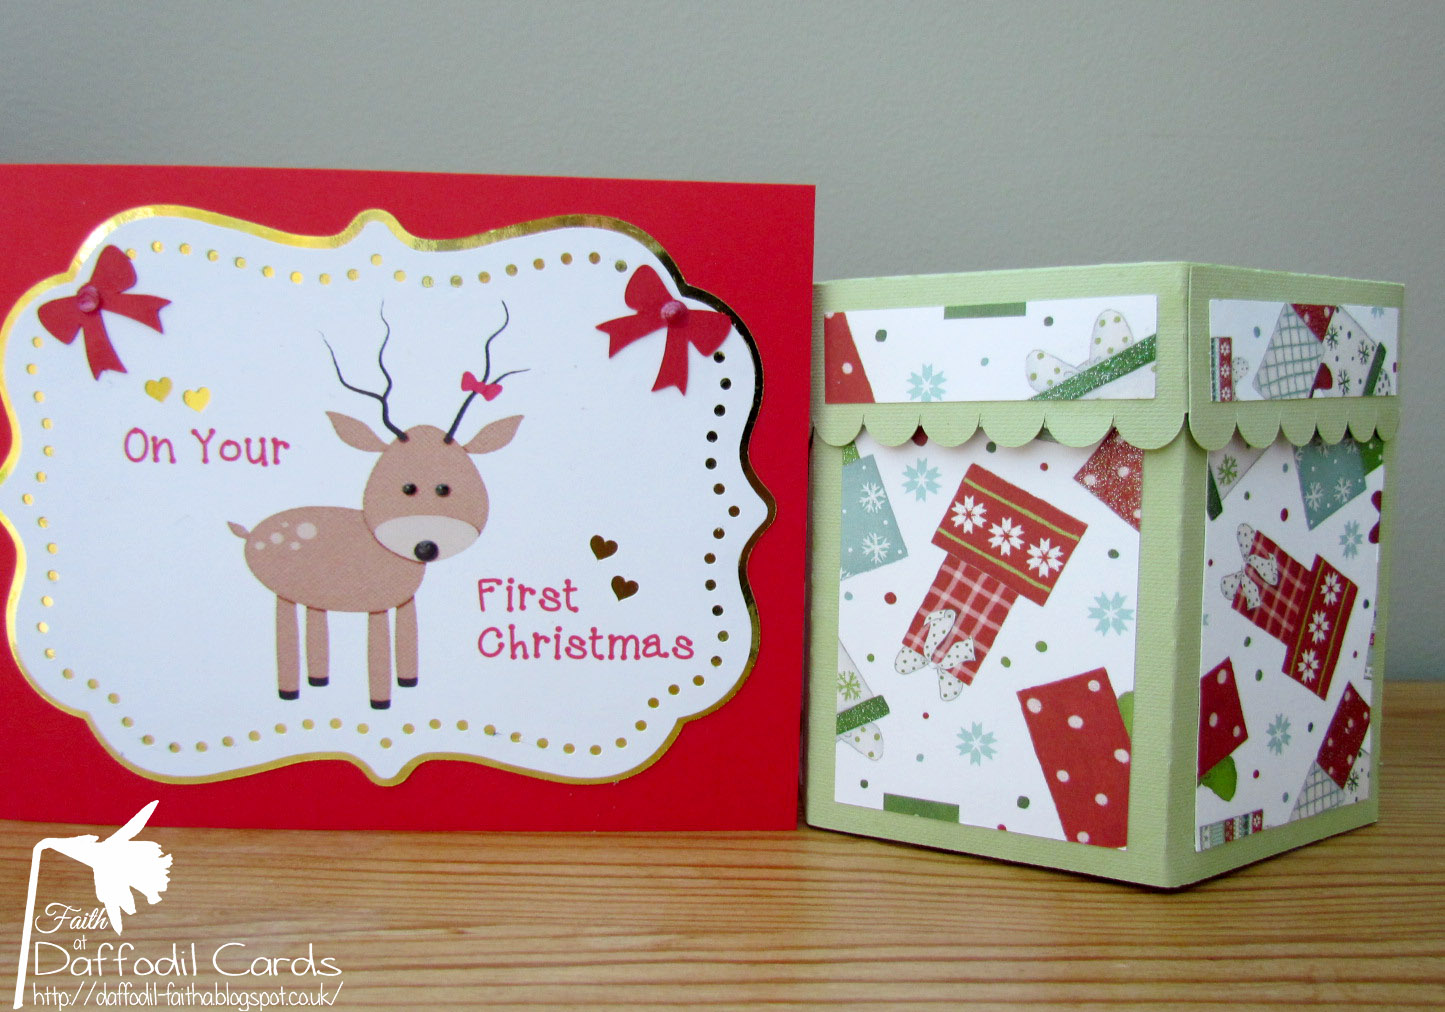
 Happy Happy Christmas. 

 Wishing you all a Wonderful time with family friends and good food.
 It's the time of gluttony, isn't it? Although, I must be careful with the sweeties / candy.

 Hi Everyone, this will be my last post until Boxing Day, as I have said previously I make gifts for the family, we don't give expensive, just something with some cash. This is a gift for the last "child" to be 18, an age I stop giving. I had 16 nieces Great Nieces and Nephews at one time and decided that as they were the "next, next generation" it was when I would stop giving. Call me mean? But another generation is coming along now, and when does it stop. Although, of course, they still get their cards and have been very understanding about my decision.

Anyhow, our Great Nephew Alfie is 14, so will be having for a few years yet! He is determined to be a Palaeontologist. I saw this dinosaur alphabet and thought it a great idea to make it for his room. I hope it's not too young for him? Out with my old Cameo 2 - of course, so easy to make things like this, I thought! I cut the A out and put it together, I bought a box frame for it to sit in. 

However, I had sized the A to be 8x8 and it didn't sit well in the box. grrr, do I cut another, no, lets get a bigger frame. I couldn't get a 10x10, so had to have a 12x12. Which meant the A was lost in it. No problem, thought I, I've got some leaves in my cut files, I'll cut a few of those for a background. I put it all together inside the box frame, added the A dinosaur and, it was completely lost in the jungle!

In the end I HAD to cut a few more layers to add to the A dinosaur, so it could stand out from the background, with different colours. I just hope he likes it!

The only way I could get a photo without reflection was to lay it down. 

leaves - Jungle Party Silhouette Design Store #424581 / #424587
leaf frame - Fox Sister Silhouette Design Store Fall leaves #332522
card - Tonic and Lidl
frame - The Range
Silhouette Cameo 2


21 December 2022

Roof tops and a story

 Hi Everyone, a log post, I hope you have time to read it all.

My card today is from a teaching time when my SiL and Brother came to visit the other weekend. She has a die cutting machine too, but doesn't do as much with it as she could, that is not decrying what she does, she does beautiful work with it, it's just different to me. Wanting to learn how to put together cards like this, we sat down and had a great time playing, leaving the men to watch TV and chat.

I chose a multi layer card, so she could see how the cutting layers went together to make a folded box card.  I also showed her how I add glitter. We were both thrilled with the outcome, except! she was taking it home to show her friends what SHE made! hahaha. I know she will tell of our time together playing.

Rooftops Box Card - SVGCuts
glitter - Decor Glamour Dust
Silhouette Cameo 
card - Lidl

 
showing the build of the box
 
 
showing the glitter

When she came, she was one of 3 brothers, 2 SiL's, hubby and me. The date was originally set for a Chef to cook us a fine dining meal, which due to the fact they couldn't get a Chef locally for the date or time, we sadly had to cancel. (We can't be living in a posh area?) I thought it would be a great idea, instead of going out for a meal. I couldn't let them down so told them to still come, from Lincolnshire, Western Super Mare and a brother just 5 miles away. I decided to make a menu and make it special for us all. My elder family are all in their 80's and without being morbid, we don't know if they could make it next year, travelling for hours. 
 
Anyway, I went into Photoshop, set up the page size and added holly borders, by A.J. Roberts, then proceeded to write the Menu. I also did the place names and took them all into my digital die cutting machine, (Cameo) to print and cut. After they had all been done, I added glue with a glue pen and added Gilding Flakes by Cosmic Shimmer. These are the results. I headed it as "F&M's Private Dining Experience". We all enjoyed ourselves and my family enjoyed what I prepared for them. A Great day.

 
Here is another of Gill Reeds Poems, I just had to let you read.
I added the Bugaboo Reindeer, all coloured in Photoshop, I didn't have time to add lots of things this time.
 I hope you enjoy it.


I hope your Christmas's will be as enjoyable.

18 December 2022

I love whatever? WLSC

Hi Everyone, my mid month DT make for December for the We Love Stamping Challenge. The theme this month is "I love…..’ whatever you love creating (image/occasion/design etc)."

Please share our challenge logo

I am one of those strange crafters who loves making cards for men. Well I have 4 brothers and many other men in the family, I have to like it or they wouldn't get cards! So my card reflects this today. 

A beer bottle was stamped and, I used a mask to stamp the second. I used water to drag the ink over the bottle, as seen in a video recently, to make it look like it was water coloured! The sentiment was stamped and embossed in gold. I also added a few tiny dots to the bottle label.  I then stamped the beer glasses using the same water technique, they were added to the corner. 

A die cut of holly was coloured in DI's and added to the card. I then decided to add more holly by placing a piece of shaped holly paper to the corner. A few gems for the berries were also added.

stamps - Magazine freebies
inks Distress inks - gathered twigs, fired brick, mowed lawn, forest moss
holly paper - First Edition 
red card - Dovecraft

There are always fabulous prizes, why don't you join us at the I LOVE... Challenge? It lasts all December, the only criteria is, that stamping must be to the fore. Simple isn't it.

 Polkadoodles Challenge wk 51

15 December 2022

CAS Christmas card?

 Hi Everyone, I hope you are now to the last of your Christmas shopping or at least with just a little to go, no panic shopping! As I have done in the past. I can't believe how organised I am this year, just the food for a small hamper I am doing for my SiL. She has to cope with her Alzheimer hubby and rarely goes out, so a few treats to cheer her up. I hope. The snow and ice isn't helping, we are lucky, just below freezing temperatures to cope with, so far.

Be prepared for a picture heavy post!

Anyhow, my card today came about with me wanting to stamp a CAS card and not having a clue what to do with it. I stamped the reindeer and sentiment, coloured the reindeer and wondered what to do with the sentiment. I took a brush, dipped into the green ink on my mat, that I had chosen and scribbled the colour on. It still didn't look right, so I stamped some stars and thought I should have embossed them, too late! A silver glitter pen to the rescue, it still didn't look right, so I die cut a square of pearlised card near enough to the sentiment colour and layered it. Attached to a square card, and I was pleased with the overall effect. OH! This CAS designing is hard work! 

The photo gives the impression the centre is not straight, the only thing I can think of is my straightening of the card made it all wonky. You get the idea anyway, don't you?

stamps - Magazine freebies SC&P
ink- Distress Ink crushed olive, brushed corduroy, vintage photo
green pearlised card - Hunkdory 
silver glitter pen - Uniball
square die - Sue Wilson Noble square dies

I thought I would show you a little of the freezing here. I love the heavy frost on the plants.


a rose flowering in December and beautiful with the frost.
 
a ball Chrysanthemum and the bird bath
 
Heuchera
 
Hydrangea

this is the most we have had of frost, although it has lasted a few days. I love the red morning sunlight of the trees in the background.

13 December 2022

Bauble and box

 Hi Everyone, today I have a bauble, box and a card I made for the youngest member of our family, Iris. It's her first Christmas. I have made one for each of her siblings in the past, mostly to remind them that they have part Welsh blood, their Grandmother, my niece, is Welsh, the children's parents are English and Scots.

I added the reindeer and the sentiment to the front shape for the card, then print and cut the shape. The gold mirror card was also cut into the same shape and layered under the reindeer layer. I had some bows in a little box, that had been cut a long time ago. I decided to add them to match the bow on the reindeer antler. The box was cut. Then paper was cut to size and added.

I bought some fillable baubles and also print and cut a Welsh girl with Nadolig Llawen, Welsh for Happy Christmas. I filled it with faux snow and hung the girl inside, next I cut Iris's name and the year, I used a bold font as her name is short and I wanted it to show up. Also added are snowflakes from permanent vinyl, adding them to the closed bauble. I hope she will like it, when she understands. Her siblings add theirs each year to the tree, which is lovely to think their parents help them to do it.
box - Simply Crafty SVG's
card - Cricut
paper - Heltz Cuppleditch (years old pad)
red card - Craft UK
reindeer -  AH Designs
bow - unknown die
cutting machine - Silhouette 2
vinyl - Oracle 651
 
 
close up of  the bauble

this shows the shape added, holding the bauble in place


10 December 2022

Noel

 Hi Everyone, a Christmas card today, what a change ay? hahaha. Anyhow, this is the card I mass produced, for our neighbours, thinking it would be easy, OH! Yes it was, but time consuming as I was thinking the word was one die and of course it was separate letters. Too late, after the embossing was done. I've chosen just one colour to show you, but I did 4 different metallic colour cards. When complete, I 3D'd it onto the card.
metallic card - Hunkydory 
dies - Magazine freebies

this shows the shine of the metallic card.


 Here is another card I did with the same metallic card, I had a call from my SiL, who lives close, could I make a card in the next half hour for her Grandson. He is a half-marathon (soon to be a full marathon) runner. I had nothing suitable, so went onto the web and found this image. I added it to my Cameo and print and cut the runner, I didn't 3D him, just added him onto the printed card background. I felt it added a little detail. She was pleased, and he liked it, that's all I need.

image - Running figure PNGTree 
metallic card - Hunkydory
 

I hope everyone is OK with the temperatures plummeting in the UK. Keep warm wherever you are in the World, apart from Australia that is! I know your Summer is starting, enjoy the early warmth.


07 December 2022

Transportation TMR

 Hi Everyone, my DT post for today is 

I have a few cars and train dies and stamps, but decided after seeing a scrap of tin in my stash, to die cut this wonderful car. I had enough over to cut the holly. 

The tin is left over from something I did years ago, just as well I kept it. I had cut a can of drink and then burnt it with the gas stove I had at the time.  It gives lovely shading when done, as you can see, I hope. It's an old technique that I'm sure most of you would have done at some time.

I also used for the background, an embossing folder, which to me showed the journey. I made an error as I had actually die cut the circle, I then did the embossing and did it on the wrong side, so it was debossed! Do I cut again, no! I decided to colour the deboss trees with gold ink to match the tin car, and I think it turned out OK.  

I stamped the sentiment and embossed it in gold onto the debossed image and die cut another circle layer from rose gold card, and added ribbon which just about matched. Thinking to make the card into a parcel? Simple, but I'm happy with it.

car and holly dies, embossing folder and sentiment stamp - Magazine freebies
circle die - Tonic
embossing powder - Altenew Antique gold
gold ink - Kuretake Starry Colours
rose gold card - The Range
ribbon and gem - stash


04 December 2022

I love? WLSC

Hi Everyone, my make today is for the We Love Stamping Challenge. The theme this month is "I love…..’ whatever you love creating (image/occasion/design etc)."

Please share our challenge logo

By now, you know I love my Cameo amongst other things, so with that in mind I made a bag with a large stamped label. I cut the bag and put it together, then stamped the circle of stars, and cut it out with a circle die. I stamped the sentiment, then decided to add the tiny stamps and colour them with DI's, 3D glaze was added to the bigger stars in the label and the tiny stamps too. The label was then glued to the top fold of the bag and I added a Velcro dot to close the label, which became part of the opening structure. Of course, it had to have a handle, so a lovely glittery red ribbon was added. A shame you can't see the shine on the stars and stamps.

There are always fabulous prizes, why don't you join us at the I LOVE... Challenge? It lasts all December, the only criteria is, that stamping must be to the fore. Simple isn't it.


circle of stars and sentiment stamps - Magazine freebies
tiny stamps - Stampendous
ink - Whispers Archival ink. (years old)
3D glaze - Nuvo Crystal Glaze
bag design - Kelleigh Ratzlaff Designs
card - Craft Sensations
ribbon - stash


01 December 2022

Dandelion Wish WLSC

OOOPs this was posted on December 1st 2022 by mistake, my copied post will be in February, sorry everyone.

Penguin CCC

 Hi Everyone, I have 2 DT cards today, I hope you will be able to visit each of them, this is for -


Anything Goes but they MUST feature a critter as the main focus 
Whether Furry, Feathered, Fantasy, Fairytale, 
Scaly, or Insect, there must be a critter...

I have had this die for a while and thought it about time he had another outing. The Mummy and baby were cut with the holly die. I added double-sided tape to the backing and added silver glitter, another layer of the Mummy penguin was added to ensure the glitter stayed where it was. I also used the die cut eye to both images.

The mountain die within the set, I used to shape the background mountains and colour and shade the background. I stamped the house and then the notice board and sentiment.

The whole layer was then attached to silver glitter paper and added to the card. The stars within the penguin, I added near the sentiment, a couple of gems and it was done.

Penguin die cut & notice board- Apple Blossom Magazine freebie
inks - Distress inks walnut stain, vintage photo
house - Magazine freebie, stamped with Distress Oxide - speckled egg
glitter paper - Papermania
gems - stash


Christmas mouse QKR

 Hi Everyone, this is one of my two DT cards today for  

We will select two winners each of the weeks 
1 using QKR Stampede  or Eureka Stamps image
 and 1 using any image!

Anything Goes every 1st & 15th of the month
 

My card today is another Christmas card, I was looking for ideas on the web and saw this sentiment, which I thought was perfect for my mouse today. I die cut the image 3 times with the Cameo. I coloured it in DI's and coloured the gold parts with gold ink, enhancing the lines with a black fine liner. I added 3D glaze on the bauble and his eyes, and inked a shadow under his feet. The sentiment was printed the same time as the die cut. I cut it up to add to the card. Then decided to add a slip of ribbon.

image - QKR Stampede Decorations digital stamp
gold inks - Kuretake 
inks - Distress Inks candied apple, festive berries, fired brick, mowed lawn, forest moss, hickory smoke, pumice stone, black soot.
die - Sue Wilson Noble square
3D glaze - Nuvo Crystal Glaze
ribbon - stash


Crafty Catz Challenge 617

Creative Fingers Challenge # 244 
 

25 November 2022

Motorbiker

 Hi Everyone, well what a rush I have been in, so many things to do, however nearly at the end now and I'll be able to show, what I've been up to.

Anyhow, here is one card that had to be rushed! I had forgotten to update my calendar and had to rush and make this card for our Great Nephew. He was 3 last week, how quick time goes. 

 His Sister and he had been bought a motorbike for their combined birthdays, so I had at least an interest to make a card with. I found this dear little image in my files which has been in my files for a long time (2013).  As usual, I print and cut with my Cameo the frame and the image 3 times. I coloured him with DI's and silver ink. He was then layered and added to the frame which I had already attached to the card. 

I then stamped my envelope with the twine stamp I used for the bauble card, (previous post).

 image - Sleike Digital stamp
inks - Distress inks, salty ocean, squeezed lemonade, candied apple
silver ink - Kuretake
frame - JanniScrap Designs
twine stamps - Altenew
 
 This is the front with the envelope
 
This is a close up of the front where you can see 
the sheen of the silver ink where the chrome should be
  
 
 this is the insert, that I put together ion Photoshop and printed


I hope you are all dry and warm with this awful weather we are having, rain, rain and more rain. There we were worried that our reservoirs were too low, and people were worried about the drought, now we deal with flooding! Ah! The good old British weather ay? Have a great week.


21 November 2022

Bauble

 Hi Everyone, I was reminded I haven't added anything to my blog! Therefore, this is one of the many cards I have done recently, I certainly have been busy, with Christmas and birthdays. Also making little gesture presents.  

Anyhow, my card today is for family abroad, trying to cut down on postage I stamped and embossed this card, a one layer, apart from the added bow! I have had this bauble for a couple of years at least and not used it before, the bow and twine stamps I had to have a few months ago and have used lots of it, especially on envelopes. The bauble and twine were stamped in red, and then I embossed the bow, twine, and sentiment in silver. I like the fact some red is showing through the silver on the twine.

bauble - Phil Martin Sentimentally Yours, magazine freebie  
bauble ink - a very old Whispers
twine stamp - Altenew 
embossing powder - Altenew

As I write it is lashing with rain, high winds dark and miserable here, at least it's not too cold at 9C. I hope you all keep dry and warm this week.

I'm entering into a new challenge for me, as CAS is not a natural thing for me to do, but hey! 


18 November 2022

Nativity WLSC

Hi Everyone, my card today is for the mid month  We Love Stamping Challenge.

 Please share our challenge logo

The theme for November is Christmas, so off I go to my stamps and put a couple together, here is the result. I die cut a few squares for the design, then coloured the larger one with DO's. I stamped the Nativity in black and the stars in white, which I embossed with white too. As an afterthought, I decided it should have a glow, so out with a stencil, I had cut with my Cameo ages ago. I placed it on top of the square and removed the ink through the stencil with an alcohol wipe, as I had seen some of you do. 

The next thing was to stamp the sentiment onto one of the smaller squares, I used DO ink and embossed it with sparkle clear powder.

I added all the white card squares to blue card and cut the border with my Mini Perfect layers ruler on the smaller size, then attached them to the base card, with the large and small bottom squares being 3D'd. 

There are some fabulous prizes, why don't you join us?

all stamps - Magazine freebies
inks - Distress Oxide chipped sapphire, wilted violet
embossing powders - white - Dovecraft, clear sparkle - WOW
stencil - Wendy Bird Designs, cut with Cameo
square dies - Tonic


Coffee Brew

Hi Everyone, a very quick post as it's nearing the end of the challenge I have been persuaded to join by a blog friend, you know who you are. SO a VERY quick card, they say coffee on a card will do, so my plain and simple, I hope will do.

I have a few digital stamps with coffee, but chose this to play with. I print and cut 3 layers of the image, sentiment, coffee cup border and one of the coffee labels,  with my digital die cutting machine (Cameo). They were then coloured with DI's, not the best card to use with watercolour, but it was grabbed and printed before I thought what I was using.

The sentiment oval edge was shaded, and the coffee labels were added to the border cups, that I had designed and cut too. Anyhow, after colouring, I glued all the parts together and attached them to the card. Out of panic mode now, I know what I would have done to add something different.

image - Jessica Lynn
coffee cup - Silhouette Design Store
border - my own design
sentiment - my blog friend Hetty sent it to me in 2019


15 November 2022

Little Donkey QKR

Hi Everyone, this is a DT card today for.
We will select two winners each of the weeks 
1 using QKR Stampede  or Eureka Stamps image
 and 1 using any image!

Anything Goes every 1st & 15th of the month

I have to admit to seeing a card, that I now can't find on the web, with the "Little Donkey" words. I just had to use this adorable donkey, because I had the song in my head. You know the one?  I struggled to get the card together though and one went into the bin. Then, I saw the snow scene in my files and had to use them together. I added an inked stencil music Clef, by the words and shaded the background with ink. A little glitter added with a glue pen and a die cut frame, and it was done.
 
 
Images -  Donkey Head and Snowy Cabin
inks - Distress Inks - lots 
stencil - Craft Sensations
dies - Sue Wilson Noble square 

 Creative Moments Challenge #240

13 November 2022

Another 60th birthday!

 Hi Everyone, my neighbour asked me to make a card for her daughter. She brought a card, she had bought, in to me, and asked me if I would use the verse for the insert, and that her daughter loved yellow roses! I asked if she would like to choose an image to use from my files. She decided on this rose wreath image, then I had to do "my thing" with it. 

I took it into Cameo deciding to make an 8x8 card, and printed the wreath and cut the age and name out. I then print and cut the top layer of roses, also printing and cutting the sentiment layer, and a single rose for the bottom left corner. The main layer was attached to the matching yellow background. The top layer of the wreath rose, the single rose and the sentiment layer, were 3Dd onto the whole card. A few gems on the label. It's a shame you can't see the layering properly, it does look quite good.   I'm glad to say she was thrilled with it. 

Roses - Creative Fabrica
cut centre and sentiment computer generated myself
gems stash.

this is the insert before printing. 
The red line is just to show you the border, it was not printed.


10 November 2022

60th birthday card

 Hi Everyone, my card today is for one of our Nieces, she is 60 on the 12th, this is her card, she doesn't look at my blog, so I know she won't see it. 

I am trying to go to my stamps before anything else to make my cards and I came across this lovely one of the perfume bottle. I stamped and die cut it, then coloured it in autumnal colours with DI's. I then found a lovely stamp for the sentiment and die cut it too. The numbers were die cut, and my paper choices were printed out. I added and coloured a tiny stamp to the sentiment, that came with the perfume bottle. 

It was then a matter of attaching the papers and the other items to the card. I added 3D glaze to the numbers and layered them 3 times. The large 60 I added a black shadow to fit in with the other images. I hope I've kept the design of 2 rectangles together? I saw it somewhere with one of the sketch challenges, and don't remember where. It just stayed in my mind.

perfume bottle stamp - Colorado Stamp Company (mag freebie)
sentiment stamp - magazine freebie
rectangle dies - Card Making Magic
number dies - tiny ones (mag freebies) lost label for larger ones
ink - Stazon
inks - Distress inks, mustard seed, spiced marmalade, carved pumpkin, ripe persimmon, antique linen
papers background - Creative Fabrica
orange spot - Down This Road Designs
glaze - Nuvo Crystal Glaze


06 November 2022

Home to Home WLSC

Hi Everyone, my card today is for the  We Love Stamping Challenge

 Please share our challenge logo

I have been, so kindly, asked to be on the DT and was thrilled to say YES. Stamping is something I really need to accomplish, so I believe being on the DT will push me into a stamping adventure. Thank you for having me Brenda.

 Don't forget there is always a prize to be won and this month the prize is the complete At Home with Santa range that will be split between 2 winners. Why don't you head over to the challenge blog to check it out? The prize winner is selected randomly and in addition the DT will choose one entry to join us as a guest designer for a future challenge.

I hope I have inspired you to join us this month, all you have to do is follow the prompt and ensure stamping is the main focus on your card. The challenge will close at noon (UK time) on Wednesday 30th November

My card today is following the theme for this month which is Christmas, nice and easy. I have cased a card I found on the back of the stamp packet. Well, I have to learn somewhere! I stamped the images in different colour inks, then stamped the house in black and used a few inks to enhance it. I then added silver paint to the mountains and snow areas and splattered it in the "sky". The sentiment was stamped and embossed with silver powder and die cut. 

All stamps - Magazine freebies SCP 223
inks - Distress Inks.  weathered wood, forest moss, peeled paint, mowed lawn, candied apple, vintage photo, tumbled glass.
silver ink - Kuretake
die - Julie Hickey 

this is the silver shimmer


02 November 2022

Gingerbread Man Pop-up TMR

Hi Everyone, my DT post today is for 

I had a long think about this theme and then decided the best, for me, was to cut it with my Cameo and add the little details to the spaces that were cut. The front of the card was made to reflect the age of a youngster in my family. After cutting the pop-up element, I also cut the red layer, which were both glued together. Then onto the front, I stamped the Santa and sentiment, then coloured Santa with DI's. I added the stars that were cut from the inside, after adding some glue and red glitter, so it coordinated with the inside, then a little silver glue pen onto the bell on his hat. Quite simple, but I'm pleased how it ended up. 

pop-up Gingerbread man - Jennifer Wambach Silhouette Design store #14814
inks - Distress Inks hickory smoke, candies apple, festive berries
red glitter - Tonic Pure Sheen
all card from stash. 

this is the pop-up element of the challenge theme

this is the front