Showing posts with label emboss. Show all posts

06 July 2025

Sun, Sea & Sand WLSC

Hi Everyone, my DT card today is for We Love Stamping. This month, we would love to see your cards with the theme chosen by Emma of  

Sun, Sea & Sand
 

I haven't got many stamps with the theme of the Sea, so I used the embossing folder I used before here. I had a freebie with my subscription magazine with the shell and seahorse stamps and the paper with a sentiment from another earlier magazine. 
 
Unashamedly, I cased the card from the packing with the EF. A slight difference, as I used the paper included in the pack in the cutout of the stamps. The EF was placed onto a blue card and attached to the base card. While sorting my craft room, I found some white hammered card for the EF and the main card. 

stamps and background patterned paper - docrafts Papermania, inside Simply Card and Papercraft magazine, a while ago.
embossing folder - Creative Craft Products, SCP magazine freebie
bakers twine - stash 
inks - Distress Inks,chipped sapphire, antique linen, ripe persimmon,
embossing powder - Papermania silver. 


Another fabulous prize this month from -
 
Lisa Horton Crafts Petal Flourish bundle, embossing folder and coordinating stencils

07 April 2023

RAINY WEATHER CHC


 Hi Everyone, my DT card today is for,
 
  The theme for this month is "Rainy Weather"

Would you believe I had trouble coming up with a card for a rainy day? I just couldn't decide, out of all the things I have on the subject of rain. Anyhow, after a few trials went into the bin, I put this together and although it's nothing much, it makes me smile.

I have had the images for years. The Raining image and the watering can were taken into Silhouette to print and cut 4 times. After a lot of faffing about with 2 other images and these, I decided to use just the 2 with a sentiment, which is computer generated. I guess I had it from the web a long while ago. The images were already coloured, I just added a light grey border for shadow on the watering can. 

I placed the layered can and raining girl, onto a dark grey card, well it is a rainy day, and drew, with the glue pen some rain, then heat embossed with the embossing powder. The sentiment was printed and die cut. It just needed a die cut tiny butterfly too. Very simple, but as I said, but it makes me smile.

image - I can't read the designer, but it was from Hugware, (long time gone.)
watering can - Garden showers - Lettering Delights
butterfly - Tattered Lace
glaze - Nuvo Crystal Glaze 
Quickie glue pen
embossing powder - WOW Clear Sparkle

 a closeup of the "rain"
 
Hope to see you at the Anything Goes Challenge, it's on for the rest of the month.

07 July 2021

TMR Christmas in July

 Hi Everyone, my card today is for


I decided to do something a little different today and do some cutting, my thinking for Christmas in July? well July is Summer (except in the Southern Hemisphere) and a little drink wouldn't go amiss on the beach would it? I thought the penguin would be happy in most environments, some live near beaches! 

Anyhow off to my digital cutting machine and cut out the images to colour. I did 2 of each, in case I made a mess of the colouring, but wanted the card layered to make it a little thicker. Yes! I could have used coloured card, which I thought would be my go to, in case I failed with the colouring.

these are the layers ready to be coloured

I forgot to photograph the colouring process 😕
I coloured all pieces, the pattern says glitter card for the white body, scarf and wine in the glass, but I decided to heat emboss with sparkly embossing powder. All the pieces were were then glued with wet glue, so there was wiggle room. Googly eyes were added and 2 ribbon bows tied together with gold elastic which also held the "glass" tag.

Penguin Wine Wrapper - Dreaming Tree
white card - stash
inks - Distress Oxide and Ink
sparkle embossing powder - WOW clear sparkle
gem / ribbon - stash


I hope to see your Christmas in July at The Male Room Challenge, don't forget to add the challenge badge, it's a requirement if you want to win.


27 August 2020

Sheep 3 ways!


 Hi Everyone, my card/s were influenced by Sally, as when I visited and saw this image, I had to have it. As you know and I keep telling you, I'm Welsh and we have a lot of sheep in Wales and the image had such a gorgeous look, I fell in love with it and it makes me smile too. 

Anyhow, when I stamped it, I had to see what it would be like on white and black card, so 3 very different cards for you. I went wild and you know? I like them all. 

The first one to show you is this new to me technique, if there is one, that I used. I stamped the sheep in black onto black card, then used watercolour pencils, which didn't come out bright enough, so I added a sheen and that brought the white up a bit. I actually liked it, so left it as it was. I added it to an green embossed wall background, as if he was in a sheep pen up in the mountains? I added a 3 layer sentiment on a plain banner die.

sheep - Woodware
embossing folder - Crafters Companion texture wall
sentiment and banner - Card Making Magic by Christina
colour - Nuvo Vibrant watercolour pencils
sheen - Lust Rub ons Craf-T Products
eye - Uniball gold glitter pen
highlight - Uniball white pen 

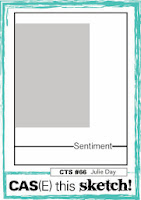
This one, I stamped and embossed onto white card, coloured with Distress inks, added a stencil to the Kraft card, which I shadowed as shown by Jennifer Mcguire. I stamped the "Happy" and cut the sentiment with the Cameo from black card adding gloss to the letters.  I had inspiration from CTS#66 sketch.
CAS(E) this Sketch!: CAS(E) this Sketch #66

Distress inks -  Antique Linen, Frayed Burlap, Walnut Stain, Hickory Smoke
eye - Spectrum Noir marker
stencil - Ranger, Mag freebie 
happy stamp - mag freebie
baaaa-thday font - Fluffy Slacks
gloss - Nuvo Crystal Glaze


This one was stamped onto black card and embossed then, fluffy stuff added, I stamped the happy onto the card and cut the sentiment out on the Cameo adding gloss to the letters. I doodled with a fine line pen around the edge of the card in a similar design to the edge of the stamp.
embossing powder - Papermania Seafoam white
fluffy stuff - Cosmic Shimmer
happy stamp - Altenew mag freebie
baaaa-thday font - DS Snowman Kisses
gloss - Nuvo Crystal Glaze
fineliner pen 

I think #3 is my favourite only because of the fun fluffy stuff I think. However each makes me smile, so perhaps I haven't a favourite, their too different? Mojo went wild with these, I wonder if it will stay. LOL
Here they are together.


17 August 2020

Sailing!

Hi Everyone, I have just realised I haven't blogged for nearly a week, I have been around blogland and have been making cards, just not getting them on here. I've also added inserts to masses of cards I have made in the last couple of months, also making a batch make, that I will show another day.

Anyhow, my card today came about in a matter of seconds, OK maybe a minute or two. We are carers for our son and we had a phone call the other day from the local Carers Association. One of their "days" was card making, well! I couldn't say no to that could I? it was a Zoom call due to Covid etc. They delivered a few things to everyone before hand and we were supposed to use them to make a card. 

During the call however everyone else was making what they wanted, only one was a cardmaker and not that often. I was a bit disappointed and tried to make things with what I had from them, it was a complete disaster, (all the others produced great cards) and when we were told we had 2 minutes to go, I threw placed it into the bin. I got the kraft card and washi tape that also came from them and got some stamps out and just went for it, this is the result. The blue circle I admit was done later to "finish" the card off.

I wouldn't say it's one of my best card by any stretch of the imagination, but for being done so quickly I was pleased so was the host. (He was probably pleased I had produced something LOL). The next one is in October, we'll see what happens then. They also rang last week, saying the next "day" was cooking? Whaaaaat? No thanks, Hubby is the main cook here LOL

washi tape - unknown
stamps - Simply cards and Paper craft # 207
 

03 August 2020

'Orsey #4

Hi Everyone, well this is my final pony/horse card to show you, I have so enjoyed them and their cuteness. I had made and cut a stencil out of card, you'll find it here. I layered twice from the cut 300gsm card and used it as an embossing folder. 

As you can see I have debossed and embossed, I wish I could say it was deliberate! I had an idea to just add the embossing to the inside edge of the card, but it debossed, so I thought I would turn the cut card stencil the other way and emboss, adding red strips, hides the join! I also added some of those horseshoes that were cut to make the stencil and embossing folder.  I'm pretty happy the way it turned out.
image - Ice Cream Pony - Hetty Clare
coloured - Distress inks
embossing folder - my own
red card - Crafters Companion  
sentiment - the web

Here are the 4 again, all made including the cut stencil

19 February 2020

Elephant emboss paste

Hi Everyone my DT card today is for
I hope you'll join us, there's great inspiration throughout the blog for
 that masculine card so many find difficult.

Don't forget to add the challenge badge to your post.

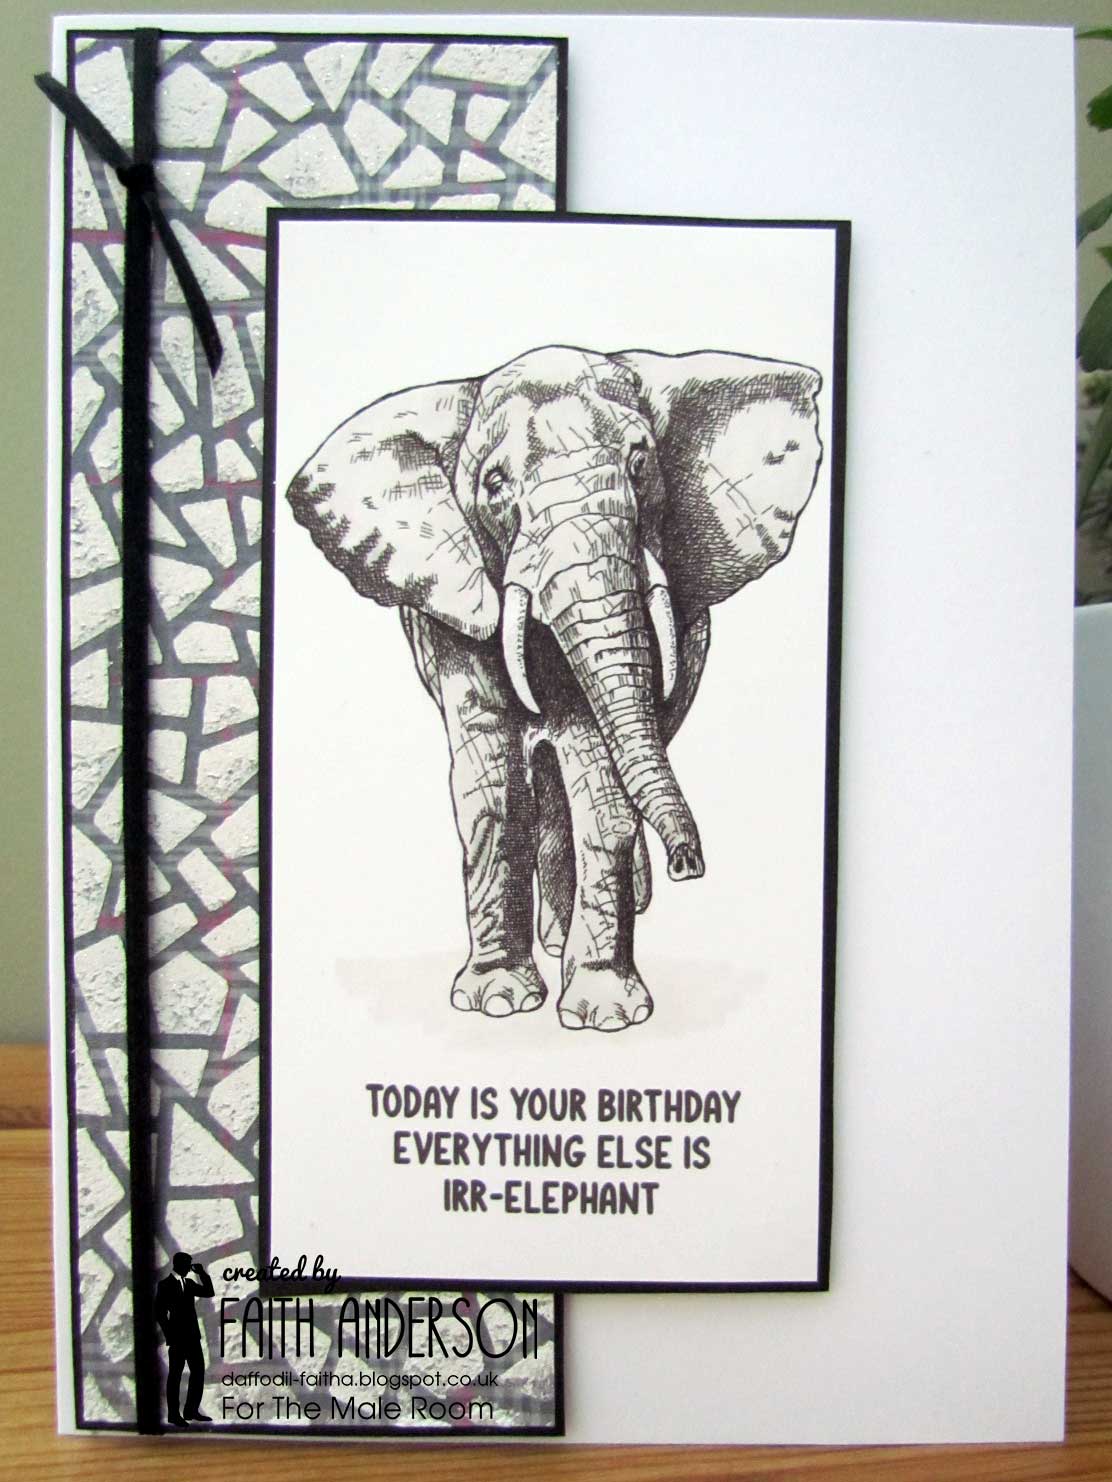
My take on the embossing, is to use "paste" which I made myself, by using talcum powder and watered down PVA glue, I also added fine silver glitter into it, I didn't measure! just got it to look like the right consistency to spread! 

Then I spread onto patterned paper through a stencil I cut out with my Cameo. I mounted it onto black paper and added it to the card. I printed out the Elephant with the added sentiment, (cased from the web). I coloured the Elephant with marker pens, and mounted that onto black paper. Ribbon added voila! I have to admit I'm loving this card. It's off to my Niece's husband.
coloured with Spectrum Noir Marker pens
stencil pattern - Silhouette Design Store
paper - Craft Sensations
black paper - stash

I was hoping this photo would show more of the glitter, 
oh! well at least you can see the patterned paper - a little LOL.

I followed this sketch, but was too late for the challenge :(

24 December 2017

Believe in the Magic of Christmas

Hi Everyone, I saw this image with Create with TLC and had to use it, I love the pink in it. Hence a quick print and clear embossing powder, then heat emboss on vellum, a little dry embossing on the Santa, although it doesn't show up much on the photo, it does have depth on the card. A quick fold and add to the card and this was done - MAGIC!


you can see the effect on the closeup, this works with any image,
 it's how I did this card.


19 August 2014

Cut Baby card a case

Hi Everyone, I'm here again this week with a card I did after seeing this one HERE I loved it, and, as I had to do a baby card quickly, it meant I didn't have to think what to do.

I already had this file by Scrapcationgetaway blog (but had never used it), so just had to cut it out and follow Bonnie's layout voila! all done.  I decided to cut the deer out in pinky colours from an old Papermania card pack. Then had to try and get the text on the print out to match, I am quite pleased with it all, even though the colours I chose are different to what I had imagined.  The embossing folder is by Cart-Us.


Challenge

http://tuesdaytaggers.blogspot.co.uk/2014/08/use-your-stash-at-try-it-on-tuesdays.html  Use your stash - the cut file is quite old, so is the PMcard, the embossing folder, the ribbon and the lace, OK I'm a hoarder!

http://clearitoutchallenge.blogspot.co.uk/2014/08/we-have-new-sponsor.html  Stash - Anything Goes - Yep! all old stuff!