28 April 2022

60th Anniversary

 Hi Everyone, I've not been a good blogger, but here is something that I made in March for an old work colleague, she and her husband celebrated their 60th Anniversary. I had a hard time getting a good photo, dark days didn't help, but I hope you can see what I did.

I was looking around on the web for quick ideas and came across a card that I thought I could case. I did take the link, but it has decided to take a walk somewhere in my craft room, if I find it I will add it. Anyhow, I die cut the hearts and added silver embossed paper from a pad I have, punched some hearts, die cut the 60, cut a banner shape on which I silver embossed Happy Anniversary, then added some gems and a ribbon bow, attached it to the card. I computer generated an insert and it was done. Yep! nice and quick. Happy to say she liked it.

heart die - Sissix
number die - First Edition
punch - name is lost in time
stamp - magazine freebie
paper -  Papermania Modern Lustre
ribbon - stash

A Quick post today as I have lots going on, but at least I have blogged!I must try and keep up with posting more, I have done work, just not shown it, I'll try and get some things together and let you see them asap. Have a Great week everyone.

EDIT - I have had a few new followers, but can't for the life of me find your blogs, would you comment here, so I can follow you also please?


24 April 2022

Cheers

Hi Everyone my card was a false DT card, false you ask? I thought it was an image by a designer I should have used!!!! So I had to go and make another for the DT card.

Anyhow, I stamped and silver embossed the Cheers image and die cut it, then what I do for a background? As I already had the blue embossed piece of card in my snippets box, I decided to use that and rub a silver pad over it, it didn't show! So I added silver embossing powder. I liked the variants of blue and silver. I had silver card in the snippets box too, I embossed that and added it to the design. Shame is that it reflects the goldy colour behind me when I took the photo.

The card in "real life" was said, by my hubby, to be "really good", rare praise, so I carried on and  and just added the celebrate dies to it. I may add an age, as later in the year one of the family children has a special birthday, that's if I haven't used it in the meantime!
 
image - Cheers
ef - unamed
Celebrate die - I think is Tattered Lace?
 

It's a long while since I played at the Snippets Playground,
 but I'm in a playful mood so off I go, I will be good, maybe a drinky or 3 that's all -


20 April 2022

Rocking Chair!

 Hi Everyone, it seems I am doing only DT posts recently, however, today I have a card I did for my BiL, it was his 89th birthday, he has dementia and I wasn't sure if he would be able to understand the joke, but thankfully he seemed to.

The photo has a slight blur, I couldn't correct it, as I had taken it just as we were delivering it to him. Anyhow, I used Gus, who I love, he has just the right expression for my BiL hahaha. I coloured him in watercolour pencils after taking him into my Cameo and sizing him, print and cutting with 4 layers. I also added, 3D glaze to his specs and sparkle pen to the balloon and bows on the presents. The sentiment is computer generated and the birthday sentiment is stamped, a simple card, but it makes me smile, as it did him and my SiL.

image and sentiment - Gus Rocking Chair, Bugaboo Stamps, (I miss them so much)
watercolour pencils - Nuvo
3D glaze - Nuvo Crystal Glaze
sparkle pen - Crafters Companion
stamps - Magazine freebies


Seeing as I'm on the subject of old? The path is finished - by Oldies!
 
A ton of stones was delivered yesterday and Hubby 79 today and my eldest brother 86, both wheel barrowed the stone up the garden, it has a slight incline onto the path, from the front of the house.  I spread the stones out by raking them around the already cemented pavers, by hubby last week, and in an hour and half it was all finished. Here are a couple of piccies of the both of them just after it was finished. Hubby is shattered with it, but went on to do more, clearing up and a bit of gardening, when he had his breath back. My brother looks like he hasn't lifted a finger hahaha. I think we all used muscles we haven't used in a while. I am so proud and lucky to have all the men I have in my life. 
This is the finished path (that I raked)

 even the evening clouds got into the celebration, trying to
 match the colour and shape of the bunches of blossom on the cherry tree.


15 April 2022

Birthday Bear QKR


Firstly today, I want to wish you all, on this Good Friday, that the miracle of Easter brings you peace, renewed faith, and comfort during these challenging times.

 
Now why you are here -

 My card today is for the challenge at QKR. Our challenge is on the 1st and 15th of every month, so you have 2 chances every month to enter the challenge.

We will select two winners each of the weeks 
1 using QKR Stampede  or Eureka Stamps image
 and 1 using any image!

Anything Goes every 1st & 15th of the month
 
My choice of QKR image this challenge was for a birthday card. I had to use him, he  is just so cute and perfect with him holding the birthday cake. I print and cut him with the Silhouette, then coloured him with Distress inks, using two of them to colour the bear, matching the paper.

I have recently had a wonderful cut file and I decided to use it for this card, as I'm too lazy busy to measure the shapes. I cut each piece of card to make the diamond shape with the Silhouette. The paper is double sided, I reversed it for each piece. I then stamped the tiny greeting. The doily shape comes with the cut file and I coloured it to match the purple parcels with Distress ink. His eyes and nose were 3D glazed and the cake icing was sparkled with clear sparkle pen.

Distress Inks - Seedless Preserve, Victorian Velvet, Tea Dye
glaze - Nuvo Crystal Glaze
sparkle pen - Spectrum Noir
paper - Craft Sensations 
pink layer card - Crafters Companion 
stamp - Magazine freebie


10 April 2022

Roses - but different!

 Hi Everyone, this is a VERY photo heavy post, please just go to what you want to see, don't feel you have to see them all.

My make today started with the Craft Club. I had printed a digital file for the ladies to cut and layer. When I got home I had a call to let me know that another one of the members had a birthday and could I make a card for her. Not being in a card making mood, I took the main image, made it smaller and left out a few images that were included in the digital file. I used my Silhouette to cut around the images and layer them. I Die cut and stamped a sentiment and voila, so to speak, a card was done for her, she isn't attending for a week or two so wouldn't have used the print out.

I then had another phone call later in the evening, to ask me to do a second card for one of the members who had fallen, who again hadn't attended that day and as I had the file in use, I decided to do another, but slightly different as a get well card, they wouldn't see each others cards, so again I print and cut with layers on my Silhouette. What I couldn't get over was the difference in printing colour from one to another, the original club cards and the first card were the same, the second card came out a much darker colour, I liked it so carried on with doing it. Although I had to take a photo of them to show you. I hadn't made any changes to the print settings! I wonder if my printer is telling me something?

card number 1
 
card number 2
 
 
showing them side by side
 
this is the card image and file
 from CraftsUPrint.com
Also used were
stamp and die - Julie Hickey
Silhouette print and cut

  I told you this post is picture heavy, are your ready? Here goes. 
 
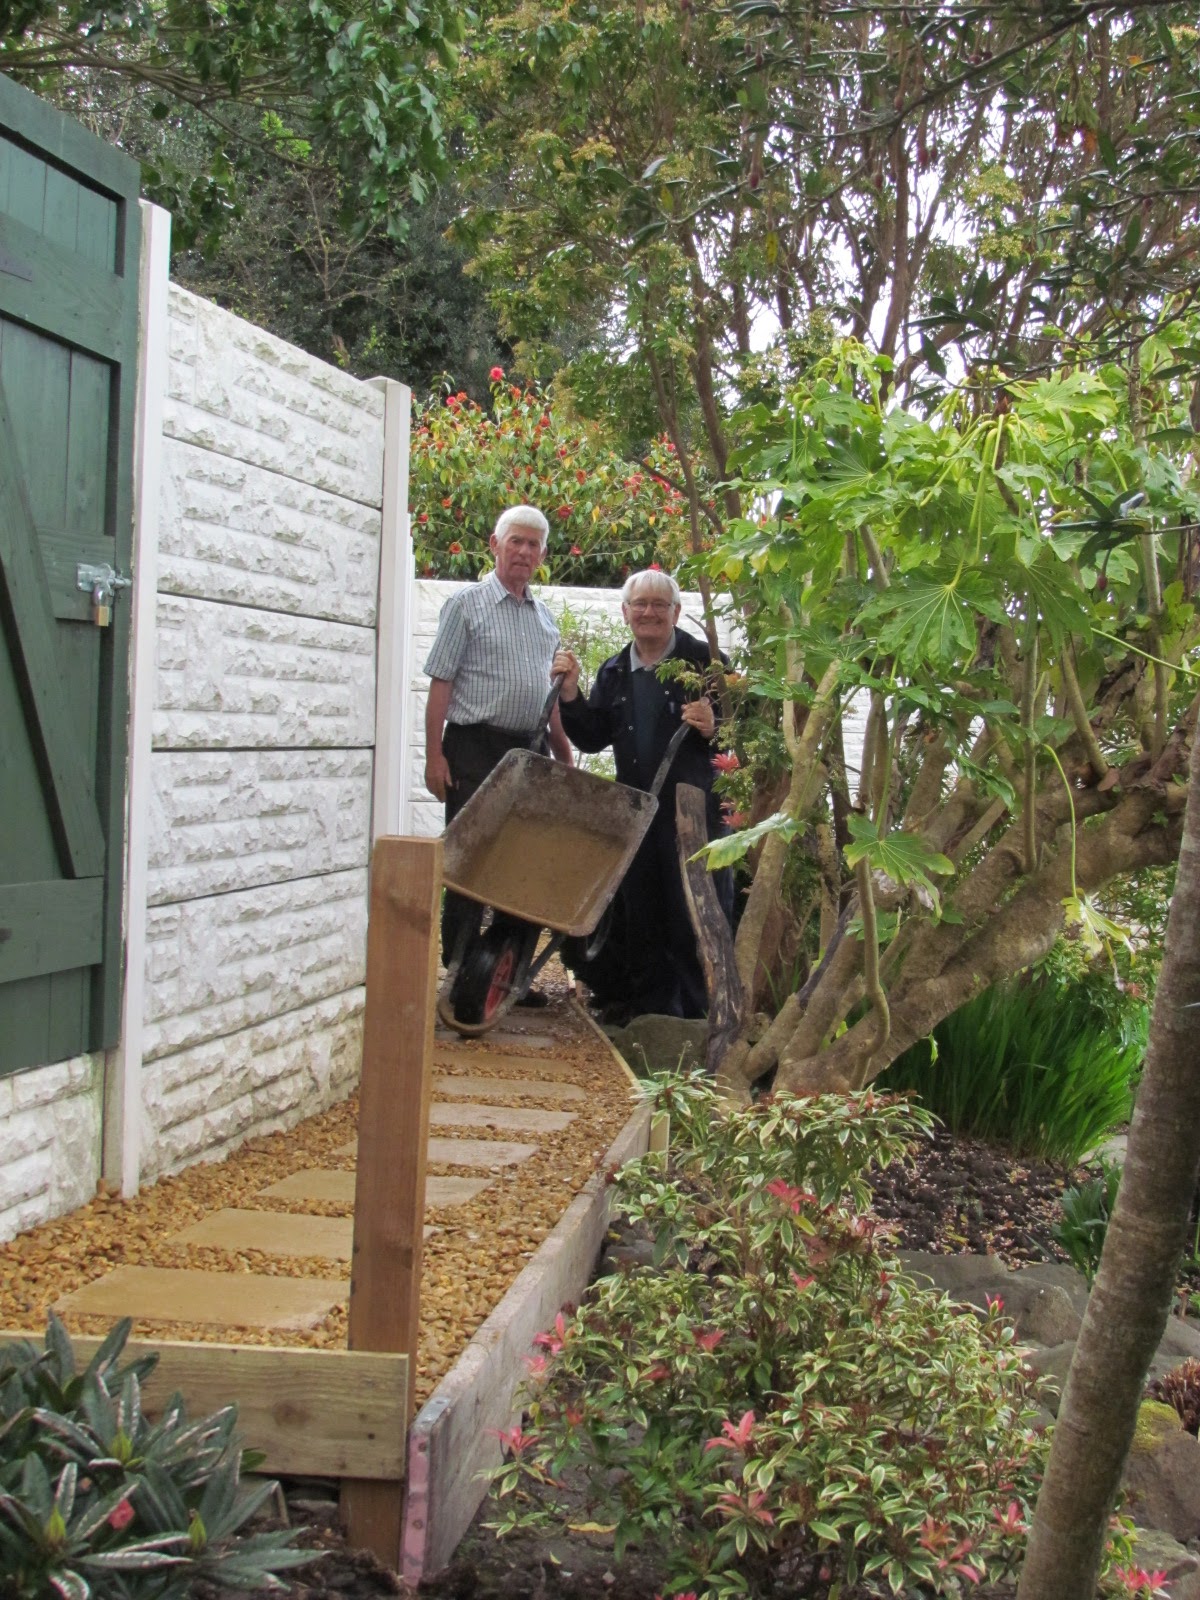
For many years the top of the garden has been neglected, it had the old conifers, that had died. After we had the wall put in, we or rather hubby had a lot of digging to do, at 79 this month it hasn't been easy, but at last, this last weekend we were able to buy shrubs, sadly not big ones, we are hoping we'll see them get larger hahaha. They were planted and a new foot path then had to be added to connect to the new planting. This is the process so far and I am thrilled to see it all nearly finished, for me it completes the garden.
 
this is part of the
 BEFORE 
 
the new path in process
 
meeting the new planting of shrubs
 
blocks found under the earth,  placed against the compost heap,
with a small wall erected to hold back the earth.
 
the left side of the garden, showing the veg garden already dug, 
with potatoes, carrots and lettuce already in. The wires ready for the 
Runner Beans and posts for the butterfly netting to protect the carrots from carrot fly.
 
these are HUGE stones that had been found in the garden previously, they were made into a rock garden! A few rock plants needed here, a good excuse to buy more plants!
 
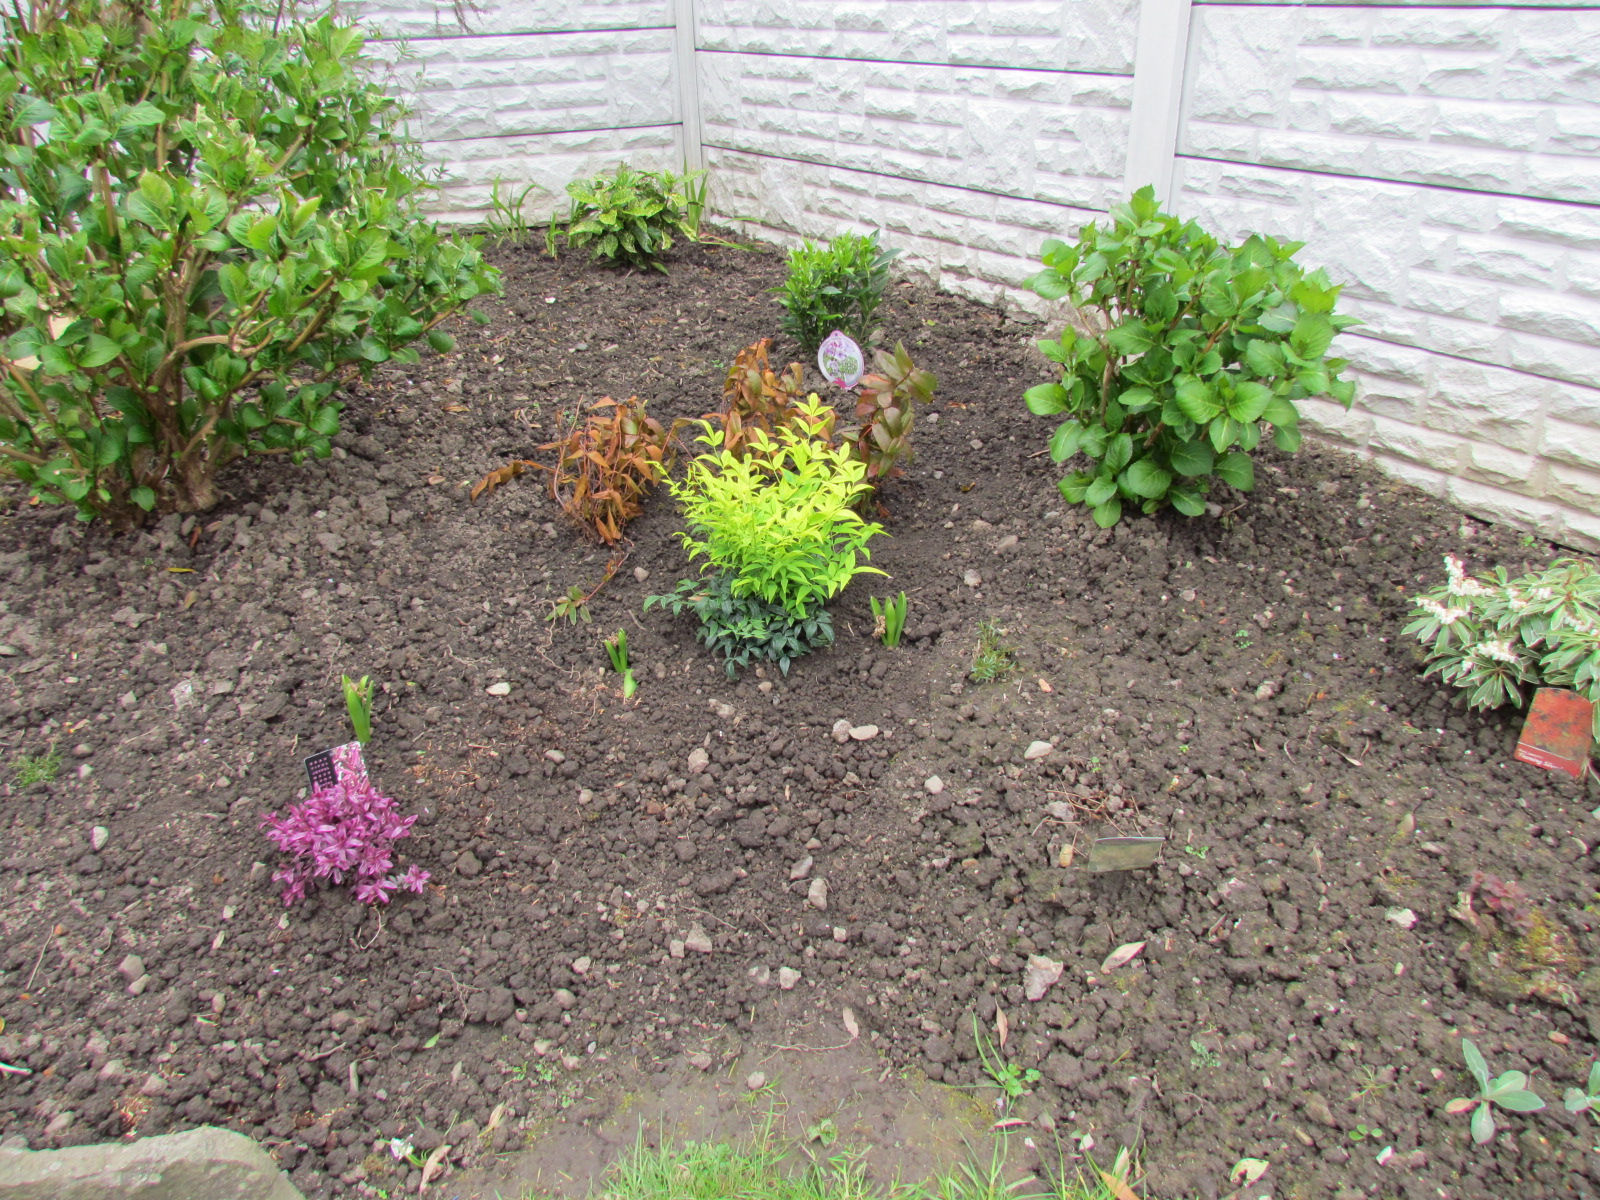
the right side top border with new shrubs and a few hyacinths past flowering indoors
in their new home, a few more things to fill this methinks. We are not sure if the hypericum has died on replanting or will come. The Nandina was placed there just in case, it may be wanting a new home if they come.
 
the right side of the garden with the new narrower border, again all new plants, except the pittosporum, the tulips have been lovely this year.
 
the patio border with another show of tulips and the rose with lots of new grow.
 
Beautiful Camelia
 
A start to the Cherry Blossom Tree, I hope the rest of the tree waits until 
this frost and chill wind is over before it comes out.
 
beautiful Rosemary flowers
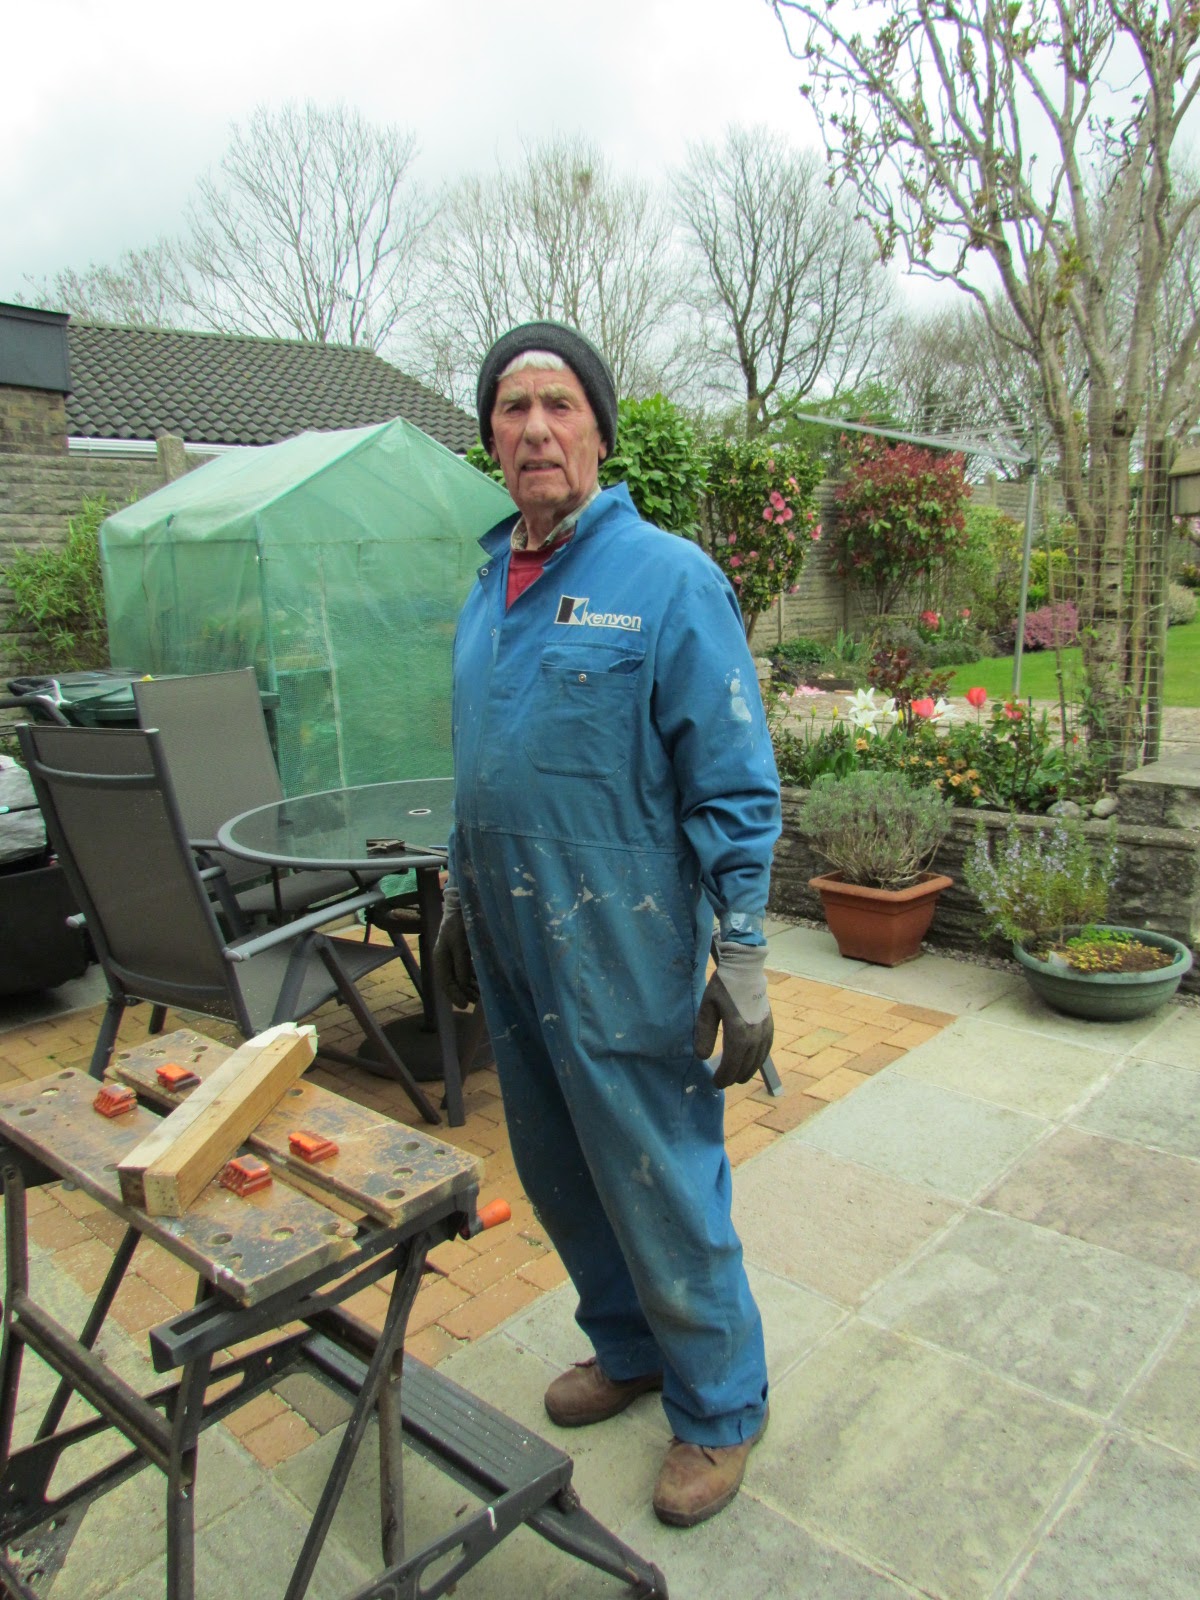
 
This is my HERO! 
who works very hard to keep the garden looking so neat.
He's wrapped in lots of layers to keep the really cold wind out, 
while he cuts the wood edging to the path. The overalls are years and years old, he has 3 new ones indoors, but won't change it! I threaten to cut it so he can't use it again. hahaha


06 April 2022

Sails TMR

Hi Everyone, my DT card today is for 


 I started with the cut out from a sailboat iris folding pattern, this being the "left over" pieces. I added a wave shape dry embossed line on the boat shape, I couldn't see it, so I used a glue pen and added embossing powder to highlight it, I had dots of powder, but I don't mind, it's the splashes of spray!

A "spare" piece of card was embossed with a curl pattern for wave shapes? Yep! that's my mind seeing things again. The sails were embossed and I added white gel pen to highlight the shapes. The clouds and sun were die cut and inked and the birds and sentiment was stamped onto the background.

embossing folders -  
Craftwell Modern Stripe, Tattered Lace borders, Cuttlebug D'Vine swirl
dies and stamps - Magazine freebies
inks - Distress Inks

 
a closeup
 
 
EDIT - I forgot to let you know we are looking for a new DT member.
DESIGN TEAM CALL

We're looking for some new team members to join us at The Male Room and this is what we're looking for:

1. You need to have a blog and also a Facebook account so you can join our Design Team group there

2. You will make one card for each challenge - our challenges are monthly - using your own supplies and stash

3. Everyone takes part in commenting and voting for our winner

4. You need to be willing to work as part of the team and be supportive of the rest of the team

5. We ask that you publicise our challenge by entering other challenges, posting on Facebook and any other social media platforms you belong to

6. We are looking for a team member to post on our Facebook Group and also on our Instagram account with regular updates about challenge cards

Interested?  Please e-mail me at maleroomchallenge@yahoo.com


01 April 2022

Easter Bunny

  Hi Everyone, I have 2 DT cards today, this is for -


Anything Goes but they MUST feature a critter as the main focus
Whether Furry, Feathered, Fantasy, Fairytale, 
Scaly, or Insect, there must be a critter...

After my computer nightmare, I have been going through a few files and found this adorable bunny, just perfect for Easter. I also found some digital Easter papers. I coloured the image in Distress inks matching the paper, then cut it with a die, layered the paper and the image which I also 3D'd. I fussy cut the egg border and 3D'd it onto the paper layers. The corner flower shape are from a die cut left overs. The sentiment is computer generated. I also added sparkle pen to the eggs and 3D glaze to his eyes.

dp -  LMS at Digital Scrapbook/Pixelscrapper
inks - Distress Inks
circle die - Tonic 
flower pieces die - Tattered Lace
pink card - Lidl
sprkle pen - Crafters Companion Clear sparkle pen
glaze - Nuvo Crystal Glaze


 Incy Wincy Designs Challenge

Krafty Chicks Challenge #606 

Love Bear QKR

 Hi Everyone I have 2 DT cards for today

This is for the challenge at QKR. Our challenge is on the 1st and 15th of every month, so you have 2 chances every month to enter the challenge.

We will select two winners each of the weeks 
1 using QKR Stampede  or Eureka Stamps image
 and 1 using any image!

Anything Goes every 1st & 15th of the month

Another of my Nieces has her birthday in March and I made this for her, she is 65, I always think of my girls, as I call them, as children, then think of their ages and that this one is a Grandmother of 2 with another due in May, where have all the years gone?

Anyhow, firstly in Photoshop I added a sentiment to paper and after printing I cut it out with my guillotine, then used a marker and ruler to edge the piece, it was attached to the card awaiting the rest to be added

 I chose this lovely bear to make her card and as I have said before, I am in the throes of adding cut shapes onto my cards. I printed and cut the bear in my digital die cutting machine as always, then cut the floral wreath background. I coloured the bear with Distress Inks, added 3D glaze to the eyes, clear sparkle pen to the flowers he is holding and then coloured the wreath again with Distress Inks, I added a few gems to zhuzh up a bit.

Image - Bear Love QKR Stampede
coloured with Nuvo Brilliantly Vibrant Watercolour pencils
Wreath - Silhouette Design - #1800128
Distress Inks - Picked Raspberry, Mowed Lawn, Broken China, Mustard Seed
sentiment - a mix of words I saw on the web

as the sun was shining I decided to take another photo in the sun.
The funny thing is, the wreath are the real colours and the bear is the real colour in the photo taken inside?