29 June 2019

Foxgloves

Hi Everyone, I had a wonderful day yesterday, besides the superb heat 27C and the SUN! it's so welcome, there was even a cooling wind, a perfect day. Due to personal circumstances we can't get to go anywhere too far that often, but as hubby's sister had asked if we would take her, we did. Her hubby has been stopped driving due to onset dementia, so sad.

We went to the Royal Mint in Llantrisant, if any of you can make a visit then it really is worth it, so much history with coins on show and one made during the time of  King Alfred in 800 AD, over a 1000 years of history in coins, we saw how they were made and designed and were even given the chance to "try" and lift a gold bar, I lifted one side of it! Also I hadn't realised The Royal Mint make coins for the USA and Russia, amongst the 50 countries in all they make for. They also make medals and awards, I hadn't realised they made them for the Olympics in London in 2012, all of it I found absolutely fascinating.

We then went on to "Afternoon Tea" at The Mint, which is dainty sandwiches and a selection of cakes, ALL Yummy, all downed with tea from a beautiful teapot and set of plates and cups and saucers. Very civilised LOL. On the way home, we went via Porthcawl, so lovely to be beside the sea, a lovely day had by all. Sorry no piccies, I left my phone "on charge" aarrgghh! and my camera behind, in a way not so bad as we weren't allowed to take photos due to security issues.
 this is the actual seating area we sat at


Anyhow onto today's card.

The stamp came in this months magazine as a freebie and I just had to use it, it's so pretty. I also took inspiration from the magazine and cased one of the cards inside.

The only thing is I am limited on colouring things, I tried watercolour, but it was yuck! in the bin. I then tried markers and this is the result, not the colours I would have liked, but as I said my supplies are limited. However I'm sure I've seen perennial foxgloves this colour for sale at the garden centre, so that's what they are LOL. The card is simple, but by the time I had it coloured I couldn't think what else to do with it! I wish my colouring was better, I suppose practice is what I need a LOT of, but it's not my favourite pastime.
foxglove, sentiment and bee stamp - magazine freebies
markers - Spectrum Noir 
red card -Dovecraft
sequins - stash
clear sparkle pens - Spectrum Noir
white gel pen - Uniball


28 June 2019

90th birthdays

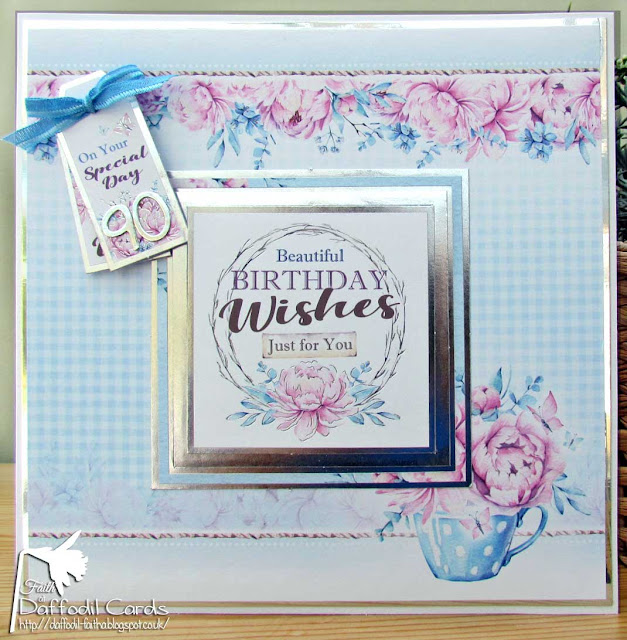
Hi Everyone, instead of spreading these cards out, I decided to blog them all, as I had made them for 3 90th birthdays within days.
This is made from a Hunkydory kit
the centres are 3D layered
90 was made with magazine freebie dies
ribbon - stash


 I  used the WRMK foil pens and silver foil, for the sentiments and square border
cut with the Silhouette Cameo
card - Hunkydory Springtime card block
Nuvo drops for corners
bow - Lil'inker
button - First Edition die
ribbon - stash

This card was meant to be the same as the previous, but went wrong for some reason, thought I could still use it, waste not want not???
I think it worked OK.
WRMK foil pens and gold foil for the sentiment and borders
paper pad - B&M
blue card - stash
gems - stash
bow - Lil'inker
twine - stash

26 June 2019

Tea popup

Hi Everyone, my DT post today is for

The Male Room

I had a few ideas, but wanted something a little different for me. I needed a challenge and this seemed just right, not too hard and still making me think! 

Anyhow on to my card,
 I count 9 layers, (front and inside) so it has the required "multiple layers".

There are quite a few templates and tutorials on the web for pop up cards, but I got mine to be used on the Silhouette Cameo 2, from HERE
Stamps are magazine freebies
so is the "steam" die, cut with vellum
All coloured with Spectrum Noir markers
paper pad - Crafty Creations
dies - Tonic pin dot


I hope we'll see you in the challenge, many struggle with masculine cards and there are lots of inspiration on the challenge blog post.

24 June 2019

Tiger Grrrr!

Hello Everyone an extra post today as I have been wanting to make another wobble card for ages, but delayed having the wobbles!

The FB Wobble challenge this time is Zoo, so a looky through my files to see this image I haven't used before, such a happy tiger. A simple card, but fun I think?
I used a digital kit by Digilicious, "finsfansfurfeet"
designed in Photoshop CS6
printed and cut on the Silhouette Cameo
with extra images for layering.
clear gloss on the nose - Anita's
Wobble which you can see in the video below is 
Action Wobbles mini size
clear sparkle pen on "Grrrr" - Spectrum Noir


I thought I would share a couple of photos of the garden, it's been a dreadful Summer so far, cold and wet, so cold we have had the heating on until last week on most days, only for a short time, it seems old age is letting us know the lack of summer temperatures. (until the weekend it seems?)

Anyhow, my beautiful Japanese Acer has decided it's Autumn and has  decided to change colour, as have a couple of other plants in the garden. Here are a few piccies to show you.


I haven't seen so many seeds on it before, but look at the end of the leaves!

even our blue hydrangea leaves are turning it hasn't even come into flower yet and they are so small this year.

We have a Virginia creeper that is travelling through the hawthorn tree that looks like it's turning to it's Autumn colour too.

Is anything happening like that in your garden?

22 June 2019

Wacky Lady?

Hi everyone, I have a "wacky" card for you today, it's for the Progressive Challenge at Limited Runs FB page. You can join and get the image HERE.

Zetti 1 image - Limited Runs digital Stamps
coloured in Photoshop CS6, I even gave her a gold tooth?
frame made in Photoshop, fussy cut out, 
covered with Versamark and clear heat embossed powder added, 
3D'd over the image
layered onto black paper - stash
button shapes - stash


19 June 2019

Japanese boxes and the story!

Hi Everyone, I have something I haven't done for a couple of years today, I hope you like them. It's a long post with a few piccies.

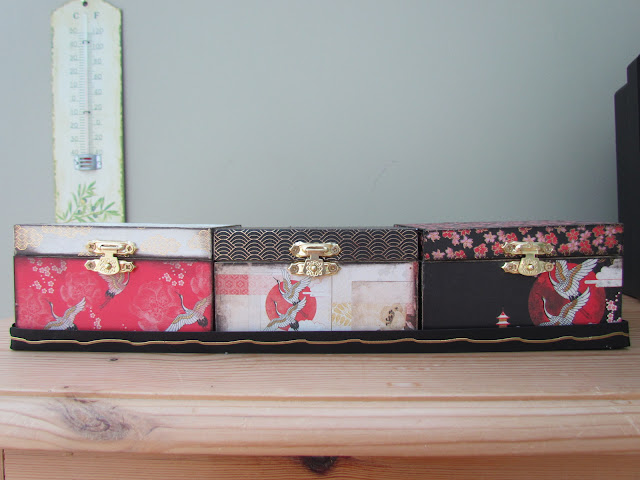
Visiting my youngest brother and SiL a couple of weeks ago, she asked, as they have been adding an extension and decorating a new bedroom suite, that I make her a copy of boxes I did for her a few years ago, but in a Japanese theme. I was thrilled she had asked.

This is the story - so off I go to get supplies, but I searched and searched for the 4 x 4 boxes in a tray for days, nothing in crafty shops  and nothing on line either, seems the previous supplier had closed down.

Then a follower email arrived including what I thought I wanted. I rang the local shop, nope, they don't have them, I knew I hadn't seen them LOL. He said that a shop further away had them, so off we go for a car ride and there were similar ones but no tray. I bought them anyway and have to say the lad assistant was so very helpful, even looking in the shop back store, searching for a tray which may fit the boxes.

Japanese paper wasn't available around here either! I had beautiful paper in my files, but didn't want to use it in case the inkjet ink ran when covered in the glue.  So a LONG online search found it, whew!
boxes - The Works
 Kaisercraft "Hanami Garden" paper pad - Ebay
let me know if you need the seller info
PVA glue, watered down

I forgot to take a piccie of the before, except of one box.
I painted the boxes with acrylic paint, then realised I didn't need too as I was papering all surfaces - duh!
 although I also painted the inside 

These are the boxes covered and inked on the edges. There were a few pages with gold embossing, so I decided to use them for the tops.

here they are with their tops attached and after being covered with the watered down glue which strengthens the paper, making it very hard wearing in use.

side views too


I still felt they needed a tray as the originals had, so into my Cameo and designed one that JUST fitted the 12 x 12 mat, to enable a one piece tray. I did strengthen it by adding another layer on the bottom and the sides before using PVA glue, watered down to add more strength, as I had done on the boxes.

I added a peel off, which added to the gold embossing I felt. This was also covered with the watered down glue.

Here they are complete.
 I glad to say she was over the moon with them.

17 June 2019

Rose Gold!

Hi Everyone, I am in my bed/craft room where the heating has just been switched off after an hour to take the chill off the house! Yep! it's Summer in this part of Wales. Temperature outside as I type has risen  from 10C / 50f to 15C / 60F it's risen to that after heavy rain with heavy clouds have passed over and lighter ones have arrived, but the wind is strong and cold. It's mid afternoon, I would love some sun and warmth from it.

This is for the Outlawz Sketch Challenge, thankfully it's every 2 weeks now, which means hopefully I can enter each one now. I was thrilled to have been showcased in the last one with this card.

On to today's card. I decided to combine the challenge with a birthday card for a Great Niece.

I was also lucky to win a digital kit from Valentina, who I have been a fan of for quite a few years and have several of her kits already. This card is made from elements and papers from her beautiful kit EVA which is on sale atm.
papers and elements, sentiment - Valentina
I arranged the image and flowers and the other elements
adding a centre border then printing and 
adding the foil from We R Memories Keepers Foil Quill 
and then cutting with the Silhouette Cameo and 3D'd one of the flowers
 I then added a border of rose gold card by Dovecraft.
ribbon - IKEA
 I have hopefully in the closeup shown you the shine of the foil. 


16 June 2019

Right the first time?

Hi Everyone, another card from last year, I can't believe how many I didn't blog. Anyhow, this was for my lovely SiL, we have a bit of fun between us about being perfect and being a Grammar School girl, (as she was,) so when I saw this image I just HAD to make this for her birthday. I used a childish font inside to emulate the original sentiment. I think it sorta matches.

CC First Time - Bugaboo Stamps
coloured in Photoshop CS6
papers - Pixelscrapper
insert caterpillar - Hugware


14 June 2019

Scrapbook pages.

Hi Everyone, a little something I have been playing with, they are of the newest babies to the family and as I saw one quickpage and one template I just HAD to use, here they are.

They are both Granddaughters of two of my Nieces! that makes them my Great Great Nieces! am I old, YEP! it seems like when they grow like this LOL.

leaves template - Akizo @ Digital Press
wood background - Sheila Reid Pixelscrapper

freebie  newsletter template - Valentina @Digital Scrapbooking Studio

12 June 2019

Chef!

Hi Everyone, my DT card today is for         

The first thing I do for any card is search for something in my files, this time I searched for chef and found this fabulous image, I just had to use it and I never have before! shame on me!
chef #6 image / papers - Shari Warren
I have had it since 2012 when it was on Hugware, 
I don't know if it is still available somewhere else.
glass gems - stash
black card - stash

I hope to see you at The Male Room Challenge this month
  

10 June 2019

Congratulations

Hi Everyone, another card I forgot to blog, I did it last year for our Goddaughters, daughter, complicated? LOL
Anyhow, she passed very well in her exams and this is what I did for her.
paper - The Range
mirror card - Hunkydory
flower dies - Tattered Lace
circle dies - Tonic pin dot
congratulations - designed and cut it in Silhouette Cameo 
embossing folder - Craftwell
gems - stash

08 June 2019

Stamped vellum

Hi Everyone, here's a card I did last year and as I hadn't done anything to add here, I thought I would go back and see if I hadn't blogged something and this was amongst those I found.

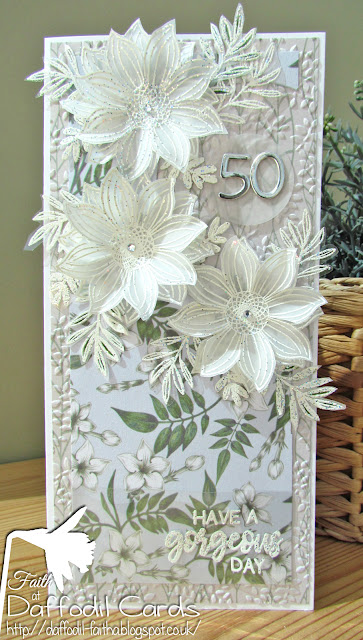
It was done for a DT and blog friend, the clever Lisa Lynne, she had kindly sent me a beautiful card and gifts that I blogged about here and she told me she was coming up to 50, hence this card. I was quite pleased with this stamping.
stamps - Magazine freebies
(coincidentally also used here!)
vellum - Crafters Companion
paper - B&M store
embossing folder - Embossalicious
number die - mag freebie

I thought I would show you the rainbow after it starting raining on Thursday, yep up to date pictures LOL.  The blurred bits are raindrops on the lens.

If you look between the trees, you may be able to see the faded double rainbow?

The double rainbow is better in this one.

This was most of the rainbow, so bright and wonderful.

06 June 2019

blue flower?

Hi everyone, my card for today is for the Outlawz Wednesday Sketch challenge  I have used a stamp very differently for me, whether it works or not I'm not sure, comments appreciated.
stamps - magazine freebies 
coloured with Spectrum Noir markers
card / ribbon - stash
embossing folders - Tattered Lace
background paper - That's Life Mini digital kit by Paper Garden Products

As I don't have black embossing powder, I stamped the flower and sentiment in Stazon and then restamped with Dovecraft clear ink and clear embossing powder, the sentiment and flower have a nice shine on them. I slipped slightly on the clear ink on the left flower, but I think it's Ok?


this is the sketch


03 June 2019

How I changed a plain vase!

Hi Everyone, something new today, last year my sister in law asked if I would make a 70th birthday present for her flower arranging sister, of course, I replied.

As SiL lives a few hundred miles away I had to buy a vase. At the time, it looked like every shop I went into was stopping selling vases! I had limited choice so chose this one. I had forgotten I had these piccies and project, so thought I would share them today.

This was the design SiL decided on, I designed it on the Silhouette Cameo, I can't find the flower to identify it.

I cut the image out of vinyl on the Cameo, removing the pieces of the image.

I added a transfer sheet to be able to pick up the vinyl in one piece

ensuring there were no bubbles between the 2 sheets

I was then able to pick up both pieces, removing the vinyl from the carrier sheet

I transferred the vinyl to the vase, making sure that the vinyl was adhered well,  with no bubbles, then removed the transfer sheet.

from previous experience and as I always drop some cream, I added plenty of covering to the vase with sticky tape, which prevents any of the cream getting onto the glass.  YEP! it etches the glass immediately.


I added lots of etching cream, in this case "Etchall". I move the cream with an ice lolly stick most of the time it's on the item, ensuring no surface is left untouched by the cream.

After about 15 minutes, the instructions says less, but I like to leave it longer.
 When time is up I take most of the cream off and replace it into the container, ready for next time, the remaining cream is washed off under a cold tap in the sink. The vinyl and sticky tape is removed and I have a wonderful etched vase that is there for life.

The following photos show it finished with a black background, as it's difficult to show the glass etched in a photograph. I was really pleased with the end result.


I'm glad to say SiL's sister was  thrilled with her present.

I saw this quote on Elizabeth Dulemba blog and thought it was just perfect for us crafters. She has some wonderful colouring pages that I have used a lot, BUT not recently, now that reminds me, there HAS to be a return to these images asap.

     "You must have a room, or a certain hour or so a day, where you don't know what was in the newspapers that morning, you don't know who your friends are, you don't know what you owe anybody, you don't know what anybody owes to you. This is a place where you can simply experience and bring forth what you are and what you might be. This is the place of creative incubation. At first you may find that nothing happens there. But if you have a sacred place and use it, something eventually will happen." 
— Joseph Campbell, The Power of Myth