Showing posts with label Creative Fabrica. Show all posts

14 July 2025

Daisies

Hi Everyone, I have had no interest in card making, probably due to the heat of the last week, and hubby not well. So I thought I would try doing something digital. It coincided with me hearing a friend has terminal cancer. I had to send her a card. I went digital with a few dies. I went looking for floral images and came across these beautiful daisies, they look like our Marguerite Daisy, that are coming into flower. 

I took the image into Silhouette and print and cut it twice, then using navy cotton, I twined it around the top of the jar. Next I die cut a sentiment and a second layer, and painted them with matching inks, then used a fine liner pen to write over the sentiment. The cotton was tied in a bow through the sentiment die, so that it hung from the jar.  

I was going to add the jar on its own, but having a background in the set of daisies, I printed two identical layers of it, and die cut one to layer them. But I think my old Grand Calibur is giving up the ghost, and it wouldn't cut it properly. So one layer was used, and I like the effect. I placed it centre and 3D'd the jar. I didn't add anything more. I felt it enough for a lovely lady who doesn't have long, I hope it cheers her up a little. 

image -  Watercolour clip arts, Creative Fabrica
inks - Distress Inks, dried marigold, rusty hinge 
dies - Mini Tag Collection and Slatted Square Collection, CraftAddictionUK
Silhouette 

04 June 2025

Fun Folds TMR

 Hi Everyone, my post today is for 

I can't believe I pondered so long in doing this card, only just making it for the challenge. With so many beautiful folds, I decided on this one. Then went on to do 4 others, 2 went into the bin, so I decided to show you the 2 I'm not too happy with, I could have done better work methinks.

My first card is a Double Z fold, a super card designed by my blog friend Shirley, I didn't do her justice on this card. The tools and sentiment with white card, and the grass with the green of the base card, were cut with my Silhouette, the background paper was cut to size and then stencilled with DO, and added to the green background. 

The tools, shelves, and sentiment were coloured with DI's, when dry, the shelves were added, and the tools placed onto them, held with the bracket piece. Then the ladder, the gloves, the grass layer with the sentiment were arranged.

double Z fold Card - Shirley's Cards 
stencil - Funky Fossil brick, coloured with Distress Oxide hickory smoke
ink - Distress Ink (lots)
card - white 300gsm Craft Card Hobbycraft 
green card - Lidl
Silhouette


My second was a template from Craftworld, a Z fold, which I transferred into Silhouette, I cut the shape, then folded it and added the printed shapes and the rabbit centre. I really don't know where my mind has been on these folds, with so many other shapes I could have done. I spent a long while looking on the web to be able to do something different, it just didn't happen - sorry.

images - Creative Fabrika

Go see what the DT have done, they are amazing.
  Great ideas for the men in your life. 

01 January 2025

Chick Birthday card CCC

  Hi Everyone, the first of my 2 DT projects today is for -

Critter Crazy

Whether Furry, Feathered, Fantasy, Fairytale, 
Scaly, or Insect, there must be a critter.


I had a card to make for my Great Niece, so took the opportunity to make it for the challenge too. I had this fabulous chick in my files, so took it into Silhouette and cut around it. Then I chose a floral Spring paper for her and cut the 6 from it. Next, I printed out the sentiment and her name. I thought it needed something else, so used a heart die and coloured the hearts in matching colours, using left over hearts to add randomly. The cut out 6 was added to the base card and the chick was added with an action wobble, to give it some fun for her. Next, I designed an insert with 2 more of the chicks from the set.

Chick - Creative Fabrica Watercolor-Chicken-Clipart-Chicken-92197332
paper - Make and Create Spring Time paper pad
Wobble - stash
heart die - Tattered Lace {very old}

 
the insert

this is the wobble action, sorry there is so much black around it, but I rotated the video and then couldn't remove the black. I'll keep trying!


01 July 2024

Cow card & box CCC

 Hi Everyone, my DT cards today is for -

Critter Crazy

Whether Furry, Feathered, Fantasy, Fairytale, 
Scaly, or Insect, there must be a critter.
 

Something different today, a card and a box. I had this image amongst others a while ago and decided to use it. I printed it out, and die cut it, first cutting the ears to go outside the frame. After cutting, I added it to black card using 3D pads to lift the ears. I found some paper in my files and printed it fit a 5x7inch card. Then layered both onto black card. The sentiment I have had copied from somewhere, a long time ago. I arranged it in Photoshop and printed it out, then using the same die, cut it the same width as the cow image, added it to black card. All then attached to the base card. 

The milk box, again something I have had a long while, but I thought it would match the card, so off to my old Silhouette, cut the outer box in white card, then the black "tube" to fit inside the box. They were then put together.  A fun pair.
cow image - CreativeFabrika Funny Cows Clip Art 2024
paper -   Hugware 2007
milk box - So Fontsy, Silhouette School 2021
sentiment die cut - Card Making Magic


23 May 2024

2 year old birthday card

 Hi Everyone, my card today was for my Niece's granddaughter.

I had seen a card with a scalloped edge, but didn't have a die to make it, so into Silhouette. I printed out the main images, as I had arranged them onto the background, also more images to do layers and cut them. Next I cut the 2 with a patterned font, also a bottom layer for it. The purple card was then cut larger to outline the image layer. 

I attached the main image to the purple card, then 3D'd the bears and stars onto it, I glued the 2 together, then added sparkle pen and added to the main card. I thought it portrayed fun and love for the little one.

background and bears - Creative Fabrika, Bears and Unicorns Clip Art 
font - Happy Party 
sparkle pen - Spectrum Noir
Silhouette

I then put together the insert in Photoshop, with the same font, but the regular font version. The verse is a mixture of a few I have in my files. I used the same background of hearts and stars and different bears. The blurred bit is my writing, I forgot to take a photo before writing it.

this is the cutie whose birthday it was

05 May 2024

Vintage WLSC

  Hi Everyone, my DT card today is for We Love Stamping. This month, we would love to see your cards with the theme, chosen by Lynn - Vintage

 
I'm afraid the theme Vintage, threw me out of my comfort zone. I had nothing in my mind that I could do, even looking on the web, didn't help, the only thing I saw I liked, was with a blue theme, so here is my version of a "Blue? Vintage".

I found this lady and a paper I thought would match her, in my files. I printed them out, then looked through my stamps to see what could be vintage, I found these cherry blossom stamps and thought I could use them.

I stamped two in Distress Ink stormy sky and die cut them, then brushed over them with an DI antique linen, that's vintage? I did the same with the sentiments. Next, I felt it needed something else and haven't used ribbon for ages, I found a grey ribbon, that I also wiped with DI antique linen. 

For some reason, I decided to use a deckle edge for the lady image, I had to go searching for the deckle scissors, I found them, and a die, that shouldn't be where it was! Decided that had to be used too, and so, after antique linen was wiped around the image after cutting, 2 corner die cuts were added to the image. I also cut the sentiments with the deckle edge scissors.

The leaf paper was added to the same grey paper as the corner die, the ribbon placed onto them, and both attached to the base card. I then 3D'd the cherry blossom stamps, which were placed around the image. The stamped sentiments were glued to the ribbon and the image. After they were all attached to the base card, I wiped around the card, again with antique linen.

After choosing a blue theme, the blue wasn't very blue, but I liked the card in the end. I hope this card is vintage enough, as to my thought process with this card, goodness knows where it came from.

inks - Distress Ink
all stamps - Mag freebies Simply Cards & Papercraft #215
image - Create With TLC
paper - CreativeFabrica
corner die - QuickKutz
ribbon - stash


Don't forget, we now require At least one stamped element on entries. Those of you like us, who love to stamp, we would still love you to enter your fully stamped entry.

The wonderful Prizes are from Lisa Horton Crafts, coordinating embossing folder, die and stencils and two dies from Highlight Crafts

01 July 2023

Four peas QKR

Hi Everyone, one of 2 my DT cards today was for -

QKR Stampede - Challenge #467

      Edited to add:  We are sad to announce that this will be our last challenge for an indefinite period.  The QKR Stampede and Eureka Stamps brands are up for sale and, until a new buyer is found, the challenges will be on suspension.  Neither can QKR Stampede/Eureka Stamps sponsor any outside challenges until a new buyer takes over since there is no website available for viewing or choosing the prize images.

I am, however, still posting the card I did for the Challenge.

A simple card today, just some Peas and a Pea background! I  thought this sentiment would be great for a masculine card.

I took the image and dp into my Silhouette and print and cut, cutting 4 of the peas with a tiny border around them. Then I coloured the peas with markers, a change from DI's. After colouring, I attached the 4 layers together and added the image to the background layer, which I had layered onto a piece of card. The "pea" background paper was also layered onto the same card, leaving a narrow border on each. 

Like I said, very simple, but fun.

paper -  Green Circles, CreativeFabrika
card - Create & Craft 
inks - Spectrum Noir CG2, DG2, DG3
white Pen - Uniball
Silhouette 

13 November 2022

Another 60th birthday!

 Hi Everyone, my neighbour asked me to make a card for her daughter. She brought a card, she had bought, in to me, and asked me if I would use the verse for the insert, and that her daughter loved yellow roses! I asked if she would like to choose an image to use from my files. She decided on this rose wreath image, then I had to do "my thing" with it. 

I took it into Cameo deciding to make an 8x8 card, and printed the wreath and cut the age and name out. I then print and cut the top layer of roses, also printing and cutting the sentiment layer, and a single rose for the bottom left corner. The main layer was attached to the matching yellow background. The top layer of the wreath rose, the single rose and the sentiment layer, were 3Dd onto the whole card. A few gems on the label. It's a shame you can't see the layering properly, it does look quite good.   I'm glad to say she was thrilled with it. 

Roses - Creative Fabrica
cut centre and sentiment computer generated myself
gems stash.

this is the insert before printing. 
The red line is just to show you the border, it was not printed.


10 November 2022

60th birthday card

 Hi Everyone, my card today is for one of our Nieces, she is 60 on the 12th, this is her card, she doesn't look at my blog, so I know she won't see it. 

I am trying to go to my stamps before anything else to make my cards and I came across this lovely one of the perfume bottle. I stamped and die cut it, then coloured it in autumnal colours with DI's. I then found a lovely stamp for the sentiment and die cut it too. The numbers were die cut, and my paper choices were printed out. I added and coloured a tiny stamp to the sentiment, that came with the perfume bottle. 

It was then a matter of attaching the papers and the other items to the card. I added 3D glaze to the numbers and layered them 3 times. The large 60 I added a black shadow to fit in with the other images. I hope I've kept the design of 2 rectangles together? I saw it somewhere with one of the sketch challenges, and don't remember where. It just stayed in my mind.

perfume bottle stamp - Colorado Stamp Company (mag freebie)
sentiment stamp - magazine freebie
rectangle dies - Card Making Magic
number dies - tiny ones (mag freebies) lost label for larger ones
ink - Stazon
inks - Distress inks, mustard seed, spiced marmalade, carved pumpkin, ripe persimmon, antique linen
papers background - Creative Fabrica
orange spot - Down This Road Designs
glaze - Nuvo Crystal Glaze


28 October 2022

Christmas Gnomes

Hi Everyone, I have done a lot of DT cards of late and now, in a what the heck do I do now mode! Because of this, I'm on a roll with digital, only because I can't think of anything to do otherwise! 

 I decided to make a start on Christmas cards and I wanted a frame, so went looking through my files and found this frame which I thought suited the images and colours of the digital kit I wanted to use.  I arranged them onto the frame.  This and the Gnomes were then added to the Cameo, where they were printed out and cut, then the Gnomes were 3D'd onto the frame. Using some found cut out poinsettia leaves, from another project, I added them too. The lanterns were 3D glazed and so were the berries. I also added red glitter around the frame, all then added to the Kraft card. 

It's a shame the details don't show up much in the photo, it's much nicer in real life. I have to look at some stamps to get myself going again. 

frame - Audrey Jean Roberts 
all other images - Creative Fabrica, Winter Gnomes 


21 May 2022

New Printer and Baby Girl

 Hi Everyone on 11th May at 9.30am a new Little girl was born into our family. My Great Niece delivered Iris Avril, a Sister to Dorothy and Owen, we are over the moon. They live 6 hours from us, so it will be a while before we see her, but we already feel we know her, with so many photos and videos of her sent to us.

Before I started on her Welcome card I hit a glitch while printing something else, my printer was making funny noises, wouldn't feed the card or heavy paper, so I tried copy paper, same thing! Noooooooo! 

Anyhow to cut a long story short, I had to buy a new printer. That is an ordeal in itself. Which do I buy? I have been looking and doing research for a couple of years in anticipation of this happening. However, I decided to buy an Epsom ET-2850, after querying with them if the printer would take 300gsm card. Well? it does and it doesn't, if I have it on borderless it won't, so I have to use it on an ordinary setting, also on Custom settings it won't do borderless. I love the print quality though and will be able to work around it. It's a shame I have to though, as my old printer did custom settings beautifully. I will miss my old printer who worked it's socks off for me over the many years I've had it. It really was an old friend.

Enough of that silliness, now the card for our sweet new baby. I found this lovely baby bear and looked for an Iris flower image in my files to add to her. I cut the lollipop she had in her hand and added an Iris flower. Also in my search this floral frame came up, it has a sunny flower, so I added that too, some brightness with the yellow spot paper and a cute font title and sentiment. I die cut some flowers that I thought matched the flowers around the card and
added sparkle pen to their centres and the bear's dress and 3D glaze to her eyes and nose. A simple card, only because I was so worked up about the printer, I couldn't think of anything else but printing!!!
Lil Bears - Trina Clark (2008)
flower die - Card Making Magic
frame and spot paper - Julie J (2008)
font - KG Beneath Your Beautiful Chunk
Iris image - Creative Fabrica
sparkle pen - Spectrum Noir Clear sparkle pen
3D glaze - Nuvo Crystal Glaze.
 
 
 this is the insert, I added another iris flower behind the teddy flower girl
 

This is a photo of the family the day they got home, Mum is very sore after the caesarean, Dorothy 4 and Owen 2 have fallen madly in love with her. I did a scrapbook page for her. I chose the papers to match her bedroom colours and what they were wearing, not typically new baby colours, but I think it works?
template - Marisa Lerin #38
dp's  Billie Irene Digital Scrapbooking (PixelScrapper)


20 December 2021

Asstd Christmas Quick cards

 Hi Everyone, a few cards to show you today, lots of piccies! These were quick cards for me.

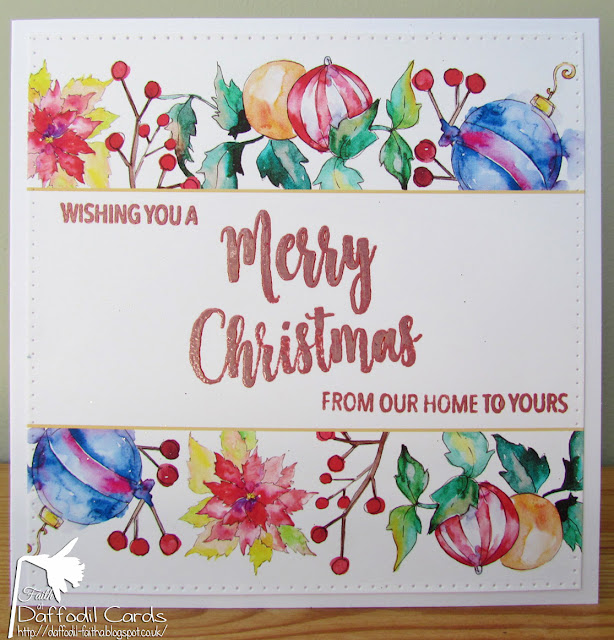
My first is a card that I printed from Photoshop, a ready made image. When I had it printed I stamped the sentiment and embossed it.

image - Creative Fabrika
stamps - Magazine freebies

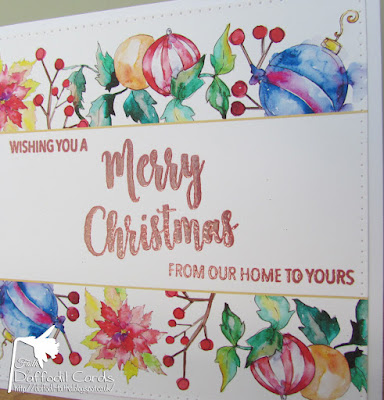
this is the side image where you can see the shine.

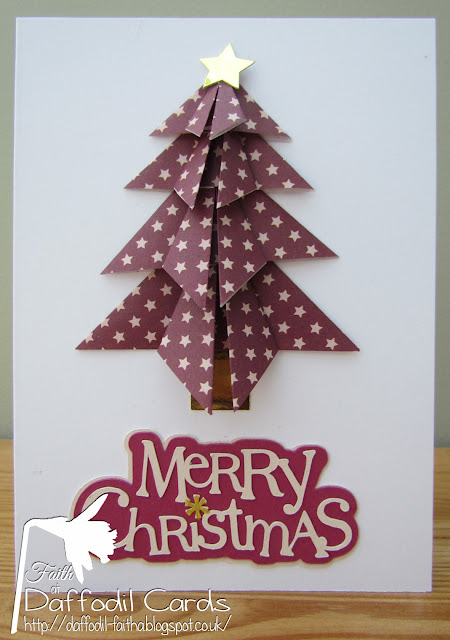
This an origami Christmas tree, I bought a cheap pad of origami paper and took it to the Craft Club, this was included in the front of the pad, amongst others to make, glad to say they enjoyed doing this.
origami paper & patterns - The Works
star and sentiment - cut on Silhouette 
gold pen - Uniball glitter pen


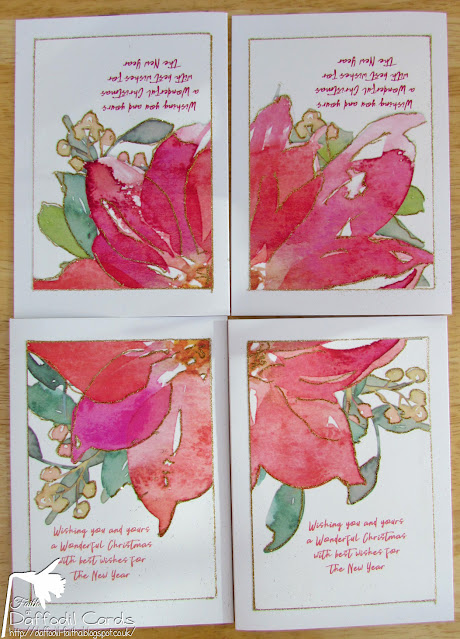
I had read on Beccy's Place blog that she had enlarged an image to cover an A4 piece of card to make 4 cards from it, so I decided to pinch that idea from her and I made this card. 

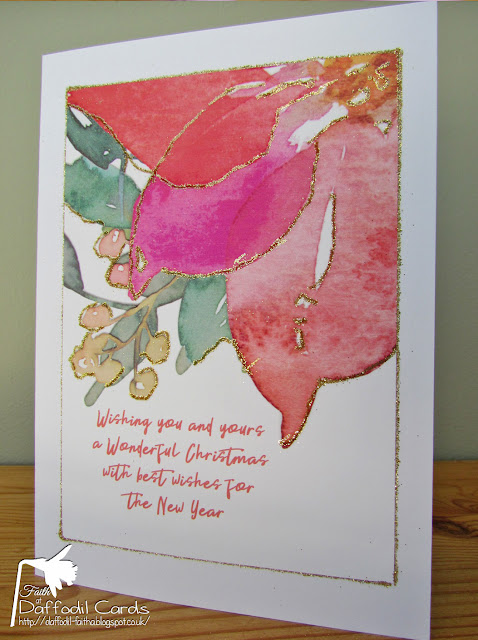
It was printed out from Photoshop, then cut into 4, I added them to 4 ready made cards and followed the outline of the poinsettia with a glue pen and the surround of the cut piece of card, to make a sparkly one layer card that had the sentiment on the front, as I had designed in PS. The image is ready coloured for quick cards. 

this is the whole image used on the 4 cards.
image - Creative Fabrika
glitter - Nuvo Pure Sheen

I hope you can see the gold glitter in this 

15 December 2021

Lemonade cat at Christmas QKR

    Hi Everyone here I am with my DT card for today

This is for the challenge at QKR. Our challenge is on the 1st and 15th of every month, so you have 2 chances every month to enter the challenge.

We will select two winners each of the weeks 
1 using QKR Stampede  or Eureka Stamps image
 and 1 using any image!

Anything Goes every 1st & 15th of the month

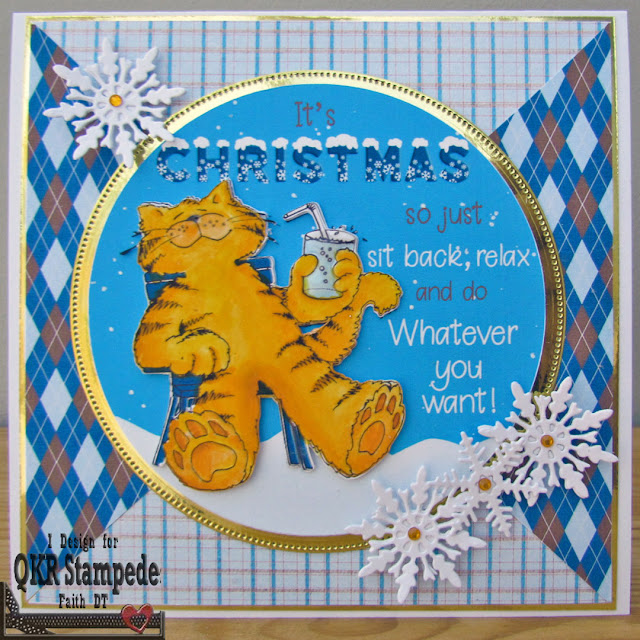
I love this image and thought he could be used as a Christmas card,  I went looking for a sentiment to suit him and Christmas, which I found on the web, however, I didn't take the link and can't find it now, - sorry! I started, unusually, for me, by choosing a sketch inspiration for the design. I then chose a few dp papers from the same kit (Frosty The Snowman). I cut them out and attached them to the card, then die cut a gold mirror card centre. I took the image and the background, adding the sentiment to it, into my digital die cutting machine, printing and cutting both the background and the image, the image was cut 3 times. 

After printing, I coloured the image in Distress inks and layered them onto the circle background, all then added to the gold circle. I added clear sparkle pen to the snow on the sentiment and the glass. A few die cut snowflakes, a few gems and it was done. I hope it gives you a smile as it does me.


Lemonade Cat - QKR Stampede
inks - Distress Inks
dp's - Carin Grobe Design
Christmas font - Snow Bold 
mirror card - The Range
snowflake dies - Crafters Companion
sparkle pen = Spectrum Noir


the font link is an affiliate link at no charge to you.


01 December 2021

Kickin' it QKR

   Hi Everyone here I am with one of my 3 DT card for today

This is for the challenge at QKR. Our challenge is on the 1st and 15th of every month, so you have 2 chances every month to enter the challenge.

We will select two winners each of the weeks 
1 using QKR Stampede  or Eureka Stamps image
 and 1 using any image!

Anything Goes every 1st & 15th of the month

My card today is fun Christmas card, this will go to my horse mad Niece. I know it's a donkey, but the feeling is the same, she will see the punny sentiment - I hope!  Her horse had to have an operation on her leg earlier this year, which kept them both locked up from riding and being free for a few months, I know they will have felt like this.

Anyhow, this is a bit of a hybrid card, with lots of different techniques to bring it together. I cut the layers in my die cutting machine then coloured them with DI's, the donkey and gate was also coloured on top of DI's with Spectrum Noir marker for texture. The background is a few layers of snow overlays designed in Photoshop, the gate was shaped to look like it was open also in PS, the tree was cut in coloured card with the other layers, I added rays from the star with gold glitter pen, 
Donkey - "Kickin it" QKR
gate - Creative Fabrica Farmer Bundle
inks - Distress Inks, Spectrum Markers
glitter pen - Uniball
snow background - Creative Market, snow overlays
snow layer - BDR snow background
tree - Sarah Bailey Silhouette Design shop
star - My Scrap Chick
sentiment - web


18 November 2021

Thank you cards

 Hi Everyone, OH! I was going to catch up and found I had literally tens and tens maybe hundreds, (seems like) to comment on, I'm sorry it's just not possible. Please accept apologies, I hate missing you and your gorgeous work. I promise to do better asap!

I want to thank you all so much for your help with my Kraft cards, I have added a couple of suggestions and if you want to see what I corrected, see here, just scroll to the bottom.

These are another reason I have been so busy, I was asked by the organiser of the Craft Club, to make Thank You cards, each one was required to include a Cross as it's a Church Club. I was given a pack of 10 A6 size cards. This is photo heavy, you have been warned.

I started by making 4 the same, then I decided to make different ones. That's the way my random mind works! 

The first I did is the purple with a die cut cross and flower with an added gem and embossed lines. It was inspired by a lady on FB, Shayne Eddie. I don't know if she has a blog. I did 4 of the cards. I have to say this is my favourite.

Cross - Dovecraft, flower - Tattered Lace, sentiment - magazine freebie 

this was printed and layered onto card, 
with a Tattered Lace die cut flower and Nuvo glaze and a gem

this was printed and layered onto matching card with a gem added and
 embossed flowers dabbed in the centre with Distress Ink

another printed card with added gems and layered onto blue card

another printed card layered onto matching card and gems added, 
with butterfly dies by Tattered Lace

both these dry embossed and swiped with Distress Oxide Inks
a piece of aluminium can burned and Sissix die cut corner. One of these wouldn't cut so I left the pieces in. I didn't add a cross to these, hoping they would be enough on their own.

here they are together. I'm glad to say she loved them.

this is the insert in all of them, I found the wonderful verse on the web 
each insert text is coloured to match the card.


by the way my affiliate post to remind you the fabulous Samantha font is here.


09 October 2021

Mermaid

 Hi Everyone, my card today is for my Great Great Niece Dorothy, who is 4 years old and such a little lady, that I had to make something feminine for her. 

I had a cut file from Lori Whitlock that I used as a pattern for the pop up card. I then went looking for paper and images to use. Luckily I have lots to choose from!

All are print and cut with extra layers on my digital die cutting machine. I had so much fun designing this for Dorothy. I started with looking for a mermaid and found a paper with lots on. I chose one and copied it from the paper in Photoshop. However I also had a digital stamp I thought I could use, indecision had me cut both out, but I chose the already coloured image. Call me lazy?

I added all the images to the pattern pieces.  After it was completed I used lots of glitter and sparkle, I thought she would like that. Shame you can't see how sparkly it is. I used fuchsia pink mirror card for the coral pieces, sentiment and age and silver for the shadow behind the sentiment and her age.
dp - sea layers Creative Fabrica
background sea/fish - ML Designs
mermaid - free paper Simply Cards & Papercraft magazine
fish - Printable Cuttable Creatables
wave - AW Aloha kit (2012)
font - KL Mermaid Tails Font Bundles
dies - First Edition 
Stickles
mirror card - The Range 

This is the layout of my images, I wasn't sure which mermaid to use, so I printed both and decided on the already coloured image. the digital image is by Paper Nest Dolls


Love to Craft#63 ATG - Yep!

Crafty Catz #567  ATG / Girly - Yep!