12 April 2017

The Male Room Architecture

Hi Everyone my card for

is a card for Hubby's birthday which is next week, he won't see it, he isn't into blogs LOL. Go to the Challenge and see what beauties the DT have done, just fabulous and so clever.

This was I thought a big challenge, then thought of a few photos taken back in 2015 of St David's Cathedral in West Wales, nothing like OLD Architecture is it? It's a really beautiful place and, in which we had a wonderful day out. I thought one of the pictures would bring back memories of a lovely day.

It wouldn't be me to just place the photo onto a card, so I played about with the image in PS and made it to look like a sketch, (something like an Architect would do?) Such a simple thing to do. See at the end of the post.

I added a layout plan of the Cathedral and embossed the layer
Dry stone wall EF Crafters Companion
  digi paper and a PS mask by Memory Scraps
 to enhance the sentiment.
Twine stash
Tattered Lace circle die
Tonic rectangle scallopped die
Sue Wilson Noble square dies.
couple silhouette.com


I had this tutorial from SnickerDoodles on Digital Scrapbooking Studio tutorials.
  1.  Duplicate your photo. (Image > Duplicate OR Keyboard Shortcut: Control + J) (PSE Users: File > Duplicate OR Control + J )
  2. Desaturate the duplicate. (Image > Adjustments > Desaturate).(PSE Users: Enhance > Adjust Colour > Remove Colour)
  3. Duplicate the Desaturated layer. Now you have 2 desaturated photo layers and the original colour photo layer.)
  4. . Invert the top desaturated layer: Image> Adjustments > Invert (PSE Users: Filter > Adjustments > Invert)
  5. Change the Blend Mode of the Inverted layer to Colour Dodge. (This will turn your document white, and that's okay!). (Using Blend Modes in Photoshop, if you need help with this step.)
  6.  Next we will apply the Minimum Filter: Filter > Other > Minimum. Set the Radius to your liking; 1-3 pixels usually works best. Experiment with the Squareness or Roundness (not available in PSE). I usually leave it at Squareness. Be sure the Preview box is ticked so you can see adjustments as you make them.
  7. If you would like darker lines, you can add a Levels adjustment, dragging the left slider to the right. (Layer > New Adjustment Layer > Levels).
  8. And that's it!
  9. Another way of colouring this  - Click on the colour photo that is in your layers panel, and drag it up to the top layer position. Change the blend mode of the colour photo to "Colour." Adjust the opacity to your liking.


10 April 2017

Mum to be

Hi Everyone, after lots of challenging behaviour from Blogger I can, at last, write a post. So frustrating, just hope it keeps up, I haven't been able to access any of my DT or my own Design area. Then played around after going to Google and finding something, changed the settings, it was even worse, couldn't load any web sites, changed it back and voila!!!!!!!!!! I never have problems with my PC, so this was a nightmare to me. - Just tried again, still playing silly b.......s

Anyway rant over, here is my offering today, a card for my Great Niece and her husband, they got married last October and have just announced joyfully, they are to have a baby, it will be my first Great, Great Niece or Nephew, they don't want to know the sex, but I have been told she favours old fashioned knitwear and clothes for it, so her Mother is busily crocheting lots for her.

Here's my card - at last, based on the old fashioned theme. I used the sketch from the Outlawz Sketch challenge to make it and used old type lace. Sentiment found on web, I thought it perfect for her

Image Mo Manning
coloured digitally
lace Dovecraft
DP, shoes and teddy Pixelscrapper


Easter Rabbit vinyl on mugs

Hi Everyone, we used to buy eggs for quite a few children, they are all grown up now and we are left with 2, here's what I did for them for Easter.

Mugs from Morrisons
952 vinyl for their names, cut on the Cameo
Sentiment is by Summertime Designs
card from stash 
 DP paper is Elle Designs, chosen as I thought it matched the mugs.
Boxes cut on the Cameo
labels printed and cut with a magazine freebie label die


08 April 2017

Easter Lilies

Hi Everyone, another Easter card, this one with

 Easter Lilies and background by Create with TLC 
digitally coloured, I decoupaged the flowers with 3 layers 
 added Dovecraft 3D pearl effects to the seed heads
Sue Wilson die for the image square
paper to match layered.


06 April 2017

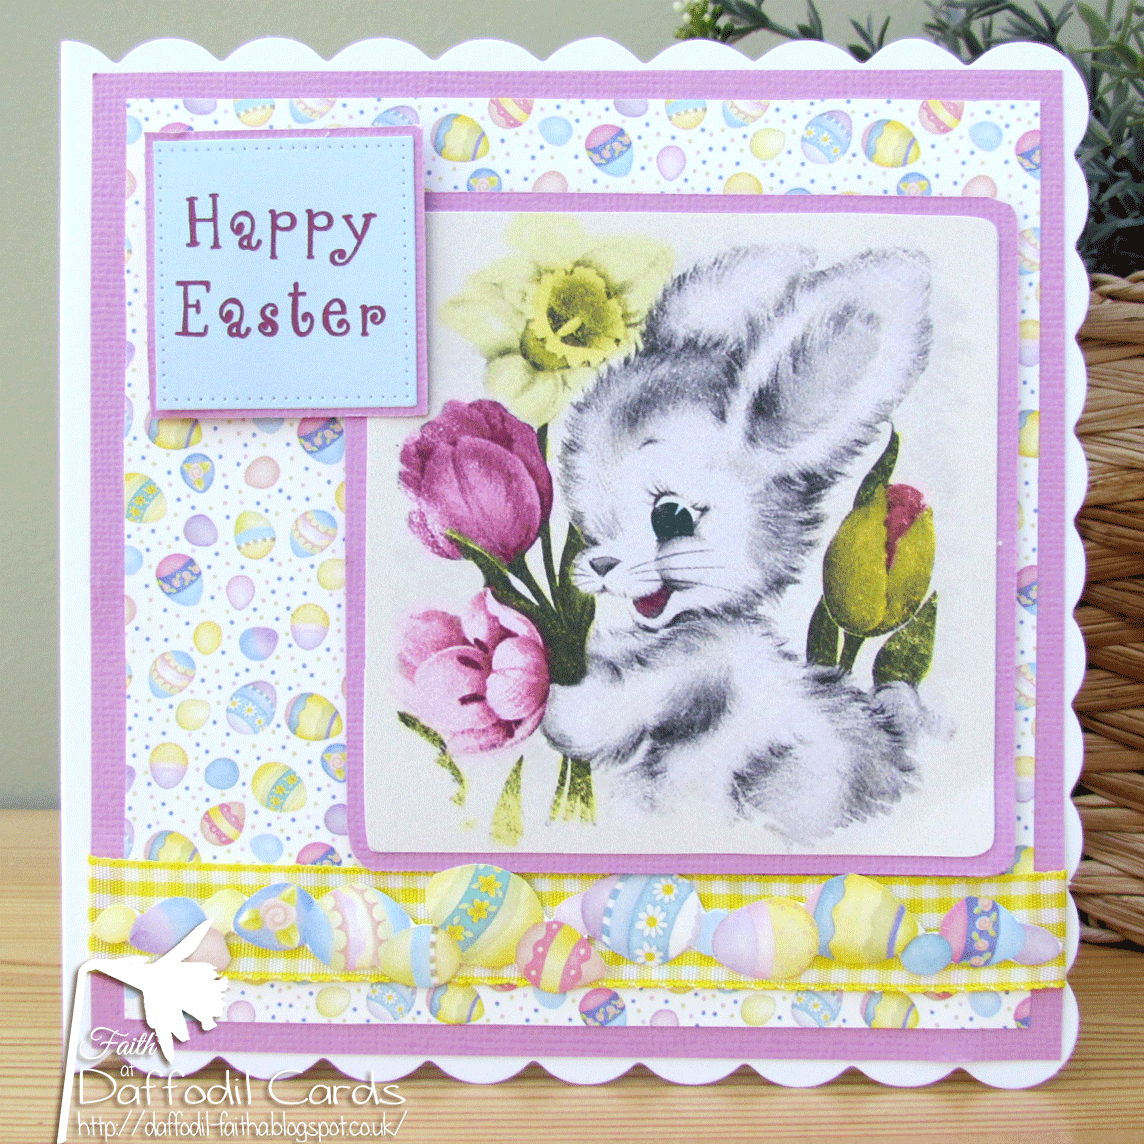
Easter card

Hi Everyone, my post today is of an Easter card, I think the image is the cutest, so had to use it.
Bunny and flowers Create with TLC
coloured digitally
DP Hugware 
egg border LMS designs
ribbon stash
printed sentiment
die My Favourite Things pierced square

http://2craftycrittercrazies.blogspot.co.uk/2017/04/challenge-1-sponsored-by-mhk-designs.html

04 April 2017

Dinosaurs and the like!

Hi Everyone, my card for you today is one I made for our Great Nephew, who has been into Dinosaurs since very small, funny thing is that most of the boys in the family have been the same. He draws them well too and while visiting recently, was talking about, wait for it! the Pteranodon, I had to look it up, luckily it came under the same label as dinosaurs LOL.

"Bird" Freebie, Kids colouring pages
I coloured the background and the "bird" digitally,
 it was placed onto acetate to "fly".

added ready coloured images of dinosaurs to the bottom of the card
 over a ready coloured background image by Hugware.

I had a look on the web for verses, found these and cased them.
The pillow box, with the verse, I cut on the Cameo, 
it has chocolate mini eggs in it, 
perfect as they are around in the shops now.


 The insert is before it was printed with another cased verse.
His name is Alfie.

Glad to say he was thrilled.

02 April 2017

Thank you

I'm still on my birthday! - sorry, but there was so much to show you. This was another Thank You card I did, with the font I made looking like honey.

Images Hugware, no longer available
PS mask used to add another colour over the honecomb background.


Here is frame my Niece sent me through the piggie site! Isn't it great? 
The main photo was taken last year, the others a 
few years ago, love how she put it together.

 AND here is another item that SiL and I put together while they were visiting.
The story behind this is, she wanted to get something for the Gardening Club quiz prize night and to cut a long story short, while browsing a shop, Hubby saw this and asked if it would be suitable, it's a pottery painted mini watering can. Says me, if it isn't we'll have it. She loved it and emailed me what she wanted on it, while here we cut it out on the Cameo and she was thrilled, so am I, hope the recipient will be too. Best part - it cost a £1. By the way if anyone lives near or goes to the club, PLEASE don't say anything about this, SiL will kill me!

I think this will be the last of the projects I made with SiL when she and my Brother visited for my birthday last month, I know it was a lot! We did enjoy it though LOL.