31 January 2018

The Moon

Hi Everyone, my card today is a DT post for
I could have chosen, as you can, I suppose, lots and lots of programs that have either influenced me or that I love, but as I enjoy Scifi programs, I decided to go with that AND as I was going through FB, something I rarely do, I came across this quote which decided that is what I was going to make.

My card came together comparatively quick for me, of late I have taken almost a day or at least quite a few hours to make, this I think took about 3 hours, still a long time, but I had to redo quite a bit, photos to follow. You can skip those!

I gave it to hubby to play with, (it was for him after all,) as the rocket just swirls around, I wish I could show you, it is such fun to play with.


The rocket is a free svg cut file by Printable Cuttable Creatables coloured with Promarkers (Yep! I coloured it with markers LOL.) and Sheena Douglas Sparkle Pens, shame you can't see the sparkle of the yellow body, the hearts and the nose of the rocket.
 the rest of the card I designed in the design space of the Silhouette Cameo
 The moon is a photo I took of the Super moon taken last December, I layered it onto vellum so it has the appearance of light around the moon.
The stars are JMD @ Pixelscrapper
sentiment by WeAre3 is also layered onto vellum

Here's what happened in the making, you can skip this bit by all means. 

I noticed before unloading the mat from the Cameo that the cut for the pennies was too narrow, so I corrected it and cut again. You can see the original cut at the top of this picture. The rocket pieces had all been put together, but not "sparkled" if you notice I changed the colour of the nose.


Added 3D tape and pads, spaced so that the pennies can run smoothly. I also cut the silver card on the Cameo to ensure it's correct size.

the penny added with the 3D added, but I had to remove it to make it slightly smaller, to run smoothly.

the top penny added

I then realised that the 3D tape wasn't high enough to allow free movement, I  added another layer of 3D and cut the layer at the top smaller, as the pennies got a little stuck in that area.

I added it to silver card so that the stars could shine through and 3D'd the rocket on top, I am thrilled with this fun card and completely different for me to make.

Go see what TV programs influenced my Team Mates, 
they are such wonderfully creative people.
29 January 2018

Scrapbook pages

Hi Everyone, it's ages since I did a scrapbook page and as I still have very little mojo to actually make something physically, I thought I would try playing in PS and these were made, funny thing is, I could have done quite a few more if time had allowed.

Anyhow they are self explanatory, I hope you enjoy them. I used layout templates by Marisa Lerin at Pixelscrapper

Winter morning
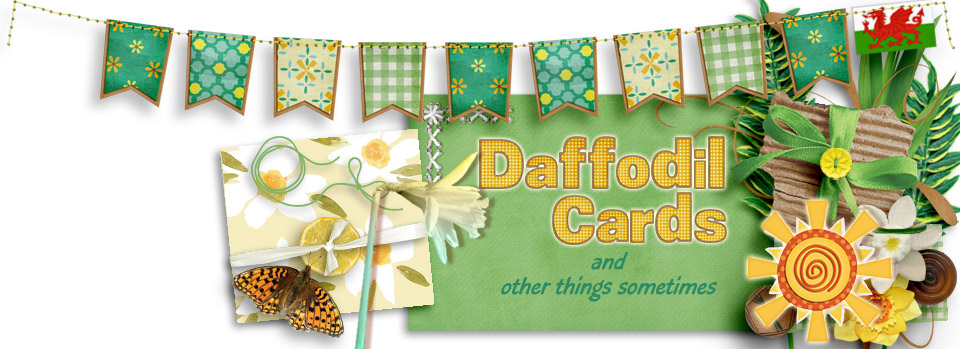
 my eldest brother with his first Great Grand Daughter

My #3 brother, I did this last year, I thought I had blogged it but can't find it!!

AND
I thought I would show you what I found in our garden,
 after I glimpsed a bit of yellow. These crocus opening up on a cold and VERY wet, miserable day, they certainly gave me a smile, BUT aren't they early?


daffodils about to bend their heads, ready to flower, in the soggy soil.

 and more coming, promising a long flowering period, hopefully.


27 January 2018

Sweetpea birthday

Hi Everyone, my card today is for the Outlawz sketch challenge, this has been a "real" challenge as I still have no mojo.

I found this image in my files listed under freebie images, so bad of me, as I usually file under the designers name. I coloured it in PS and added a green shadow behind the image, maybe a little too pale? I designed the papers in PS, adding images to add texture for the pink and the green.

All were printed and cut out, the front layer 3D'd so that I could add the die cuts made from Create and Craft pale pearl card, which matched wonderfully with the paler pink and the darker, although it looks the same in the photo. I also chose the Tattered Lace die, as I felt it looked like sweetpea tendrils curling around the corners.

I decide it would be a birthday card as you can see from the insert I also did in PS.


25 January 2018

Thank you

Hi Everyone a card today is using elements and papers selected and arranged from this kit by Valentina, I enjoyed selecting and placing the items in Photoshop, I printed each out and layered onto the card.

The background paper has a digital crease in it, doesn't it look real? I 3D'd the circle and the flower on the saucer, also the sentiment circle and though you may not see it, I added Sheena Douglas Sparkle pens to the flowers and the wings of the bird,  a few sequins to add a little bling.

23 January 2018

Shaped edge

Hi Everyone, I am not at all motivated to do any cards or anything else come to that, but, as a follower, I had an email to let me know that Shirley's Cards had a freebie, so off I went to have a looky and this lovely design was offered. I decided that I would get off my backside, so to speak and get this card done today. Shirley has some wonderful designs here Shirley Young Designs too, worth a looky I assure you.

Anyhow onto my card, I cut it out of linen card 300g from Crafter Companion, so quite heavyweight and it cut so beautifully with my Cameo, using the default cutting recommendations.

 I then decided to add floral paper from my files and add plain to compliment the diamond shapes as Shirley did in her example. Less thinking for me LOL. After searching through my files I found this paper by Janet Scott at Pixelscrapper, which set the colour of the rest of the card.

I made a little change to the design by adding a freebie sentiment download from Crafting.co.uk which I felt matched the swirls of the butterfly. I printed the paper for the background, the butterfly and centre of the flowers, then cut it all out on the Cameo. After it was all put together, I added some silver gel pen to the flower centres and the butterfly and swirl. Just enough glimmer I felt.

I tried to get a good photo, but the sun has been rather lacking of late and this was the best I could do.


21 January 2018

Floral heart

Hi Everyone, my card today is for the Outlawz Sketch challenge. I've altered it slightly, but I think it still shows the sketch (I hope). I am also adding it to the Limited Runs FB freebie challenge.

I transferred all images from Photoshop, where I designed the card and coloured the heart image, to my Cameo (I'm using it a lot). I printed and cut everything, then made an oval shape smaller than the green layer I added hearts around it, this was then cut out.

I placed the layers onto my card, but before adding the ovals, I used chalk to colour the edges - I think I should have Brownie points for doing that LOL. They were 3D'd with the flowers and leaves, a few sequins and my card was finished. I used the PS design layout to use as the insert.
central heart - Limited Runs
dps and images - KIMB Designs @ Digital Press


19 January 2018

How could I forget!

Hi Everyone, my card today is for the Dragons Lair FB colouring challenge, we have been given a wonderful elephant and this is my take on the image and colouring.

The shame is that as it was a miserable rainy day the colours haven't come out in the photo. I thought I would share it anyway as he's too cute not too.
Elephant frame - Dragons Lair
floral paper - Create and Craft
middle paper I designed in PS, trying to match the frame of the image. Background paper and scallops coloured to match the frame. Seems they are too pale to show up properly!


here's a closeup, it does show the 3D gloss on his eyes

17 January 2018

Vintage

Hi Everyone, my DT card today is for the challenge at

you have to go see what my Team Mates have done, 
they are so clever with great ideas for men. Have a look at earlier posts too, if your short of ideas for men, you will find something here.

- and,  it is just in time for me to make an 82nd birthday card for my eldest brother, who will be on holiday in Tenerife, so this has to be given him before he goes.

Anyhow onto the card
telephone - SVGCuts, a freebie
background paper - Create with TLC
sentiment - my own
rays - PS shapes
dies - Tattered Lace pindot circle
centre is vellum laid onto gold mirror card to defuse the shine.
top layer of phone is glossy black card

here are a couple of photos to show how I cut the centre numbers, which are not included in the cut file. 

With the dialler, I added numbers in the centre of the holes to ensure I had the right size to fit, this is on the design area of the Silhouette screen.


This is the numbers cut, which I decided to do in vinyl as they were so small. I used a transfer sheet to add them to the centre white area of the dialler, then tried to remove the transfer sheet and found the top layer of the card lifted, so I just left it on which gave it a shiny effect, an accident that turned out quite well.

here is the size of the numbers on my wrinkly finger LOL, I cut 2 in case a couple of numbers didn't release.

You may have noticed I cut the dialler stopper in silver, I got the shape by copying the dialler in Photoshop and selecting the shape, copying it and adding it to the Silhouette design area, tracing it and cutting it out 3 times. 


I LOVE LOVE my Cameo, I am finding out more and more things I can do with it and it astounds me when it can cut something to tiny out of card and even smaller in vinyl, the stopper is 10mm x 6mm at it's widest to 2mm at it's widest.
in inches - 7/16th x 5/16th at it's widest to 2/16th at it's narrowest, cut in mirror card.


15 January 2018

Fly

Hi Everyone, it's ages since I did a post for Create with TLC and as Paulette is always so generous with her images and quotes I feel very guilty, so here is a card with not only a quote, but, also an image, both freebies recently. I felt they were meant to be matched? I hope you think you so too. (btw - the sentiment is straight, just the way the photo was taken!)
I haven't played at the Outlawz Sketch Challenge for a while either so two for one LOL.

Image and quote Create with TLC
dps - Sheila Reid at Pixelscrapper
bow - Dovecraft
coloured with Spectrum Noir marker BG4


13 January 2018

Set of Birthday Cards

Hi Everyone, this is a picture heavy post with assorted makes, I hope you can last it out LOL.

I thought I would finish off my gift giving makes with this set of birthday cards, which I made for one of my Sils, who actually buys special cards off a friend. I thought these may help.

Everything here was made with the help of the Cameo, dies, and a paper pad from Craft Sensations. I hope they are different enough so she will like at least one LOL. I made the most beautiful box to house them and the envelopes and forgot to take a photo of it duh! You can see the final package below the cards.


Below in the green metallic paper are the cards all packed up, the little box has a few choccies in it, the penguin pack is for my brother. (He also had one of the beer packs )

these are more gift bags containing choccies 

Here are a few more cards I did, 

a little blurred - sentiment on sparkly ribbon,
 the sentiment is a file by Shirley's Cards & this link 

Crafters Companion Christmas CD


Salztburg scene - Karen Lowe cut file

You'll be glad to hear that's the end of the Christmas cards :)

11 January 2018

Boxes

Hi Everyone here are a few boxes I did for Christmas, they hold a few chocolates and I gave star ones to my "luncheon" friends and the others to acquaintances  instead of a card, they were thrilled I'm happy to say.

These star treat boxes cut from mirror card are
 from Monicas Creative Room, with
 labels I made into a cut file by Gina Cabrera,
 tied with gold twine from stash

 these star boxes were a freebie file I made into a cut file, 
from Papercraft Inspirations magazine,
 cut from mirror card


09 January 2018

Circle Chevron easel

 Hi Everyone, can you believe we are already into the second week of 2018? I hope the rest of the year doesn't go so fast LOL.

A card today I did recently for our GNephew, I'm glad to say he liked it.
circle chevron cut file - SVG free files
easel design I did myself
sentiment using Silhouette pens
buttons from stash
birthday die - Tonic
paper - Craft Sensations


07 January 2018

A Deer card

Hi Everyone, back to Christmas and a card and box I made for my new GGNiece, when we were looking around a local store's Christmas display, I saw these little baubles and thought they were perfect for a baby of mixed nationalities of Welsh, English and Scottish with a little Irish from her ancestors LOL. It would remind her of her Welsh heritage, I hope with the Welsh National costume, the Welsh National flower the Daffodil and of course the Dragon on our flag, it will.

Anyhow, the card is a cut file by Lori Whitlock, but I added the cut hearts and wrote the sentiment with the Silhouette pens, then added the layer to gold card also cut with the Silhouette. A couple of gems and it was done.

The box is a cupcake cut file from Paper Garden Products

showing the cupcake holder inside the box, 
I had to make the hole slightly bigger for the bauble.

this is showing the bauble which has "Nadolig Llawen" written on it, 
which is Welsh for "Happy Christmas".


05 January 2018

Hoot Hoot

Hi Everyone, one of my old workmates and lunch pals is 80 this week and this is the card I did for her, she is a fanatical owl collector of anything and everything, so it HAD to be an owl card.

The pattern was a freebie from Papercrafts Magazine, I added it into the Silhouette Cameo design area and made a cut file from it. The card is a 7x5 size (7inches tall), I LOVE LOVE how the eyelashes cut. I added faux stitching, again with the Cameo. I added "real" paper from a pad by Craft Sensations, then added glitter with my new Sheena Douglas Sparkle Pens.

The sentiment was done on the computer and added to a free owl die, again a freebie from a magazine. A ribbon bow, cut and write the insert with the Silhouette pens, using an owl digital doodle stamp by ECoombs at Pixel & Co, and it was done, I cut a slice from the back layer to help it stand straight. I hope she liked it.