09 March 2025

Cars 17th birthday card

Hi Everyone, it's my birthday today and I have my family coming for lunch, I love having all of us together.

We all live miles and hours from each other, and as all of us are older, I wonder, each time we meet, if this will be the last time we will be able to get together. With driving becoming more complex, and heavy traffic on the roads they have to travel. Thankfully, the furthest away from Lincolnshire is staying a few days. 

We have kept up a tradition, to meet at least once a year, it's usually a couple of times, as we did when my mother was alive. 

Here is a photo of us a few years ago, one other brother sadly passed. 


Anyhow, enough of my indulgence, here is a card you came here for, it's for a Great Nephew, on his 17th birthday, he is getting a driving licence, so I thought a car card would suit. I've had this in my files from Shirley, my blog friend, for a while and thought it would be great for him. I took it into my Silhouette files enlarged it to an 8 x 8 inch card size, and cut it out. Also added a 17, to cut and add to the centre card, as they are on racing cars. 

After cutting it all out, I coloured the top layer of cars with the same colours Shirley had, with marker pens and then glazed them. When dry, they were added onto the black layer and glued together. Both layers of each car were attached to the main card.

The road backing layer is included in the file, so I printed that out and placed it inside the front layer. I had added a birthday verse inside by double printing. After taking the photos, I added glue to the front layers, to make them sit flatter onto the paper. I also made an envelope to fit. 

car card -  Car Birthday card Shirley Young
markers - Spectrum Noir
glaze - Nuvo Crystal Glaze

 
 this shows the glaze effect, which I'm pleased with

05 March 2025

Happy & Bright TMR

Hi Everyone, my DT card today is for 
https://themaleroomchallengeblog.blogspot.com/
I was stumped big time with the mixed media, but after looking online for ideas, I came to the conclusion that it was just using different things to make a card. Please correct me if I am wrong.

I had a few male birthdays, well 7, out of a total of 11 birthdays in March. I decided to do 2 similar, but, I didn't know where to start. Going through the many paper pads I have, I found bright papers, suitable for the male species. These were die cut for a landscape 5 x 7inch card.

Then my Silhouette came out to cut this layered happy birthday, in matching colours for each paper. Starting with the light blue background, then the black layer, the purple Happy was next, then the black and green for the birthday. I coloured all the additional letters cut in white card, for layering, in colours to match the papers. 
 
The Happy letter cut out, was used as a "stencil" to add a glass bead paste layer onto the Happy letters. The birthday letters were covered in 3D glaze, after I had attached them to the birthday layer. Just one thing, t looks like the B and the R are both red, nope, the B is red, the R is orange. It must be the light.

I then stamped a sentiment and die cut it, adding it to the finished card.
my mixed media, contains
die cut, stamping, stencil, glazing
 
paper -  Craft Sensations 
Happy Birthday - My Scrap Chick
die - Card Making Magic 5 x 7 Card & box set
Silhouette Cameo 2
layered card & paper - Lidl
white card - Crafters Companion
glass beads paste - Winsor & Newton
3D glaze - Nuvo Crystal glaze
birthday stamp & die - Julie Hickey Birthday Sentiment stamp set

I love the bead effect, I saw it originally on a Christmas tree on Loll's blog here. Not the same brand, though, hers looks finer and more even.


02 March 2025

Hello Spring WLSC


 Hi Everyone, my DT card today is for We Love Stamping. This month, we would love to see your cards with the theme of  

Hello Spring


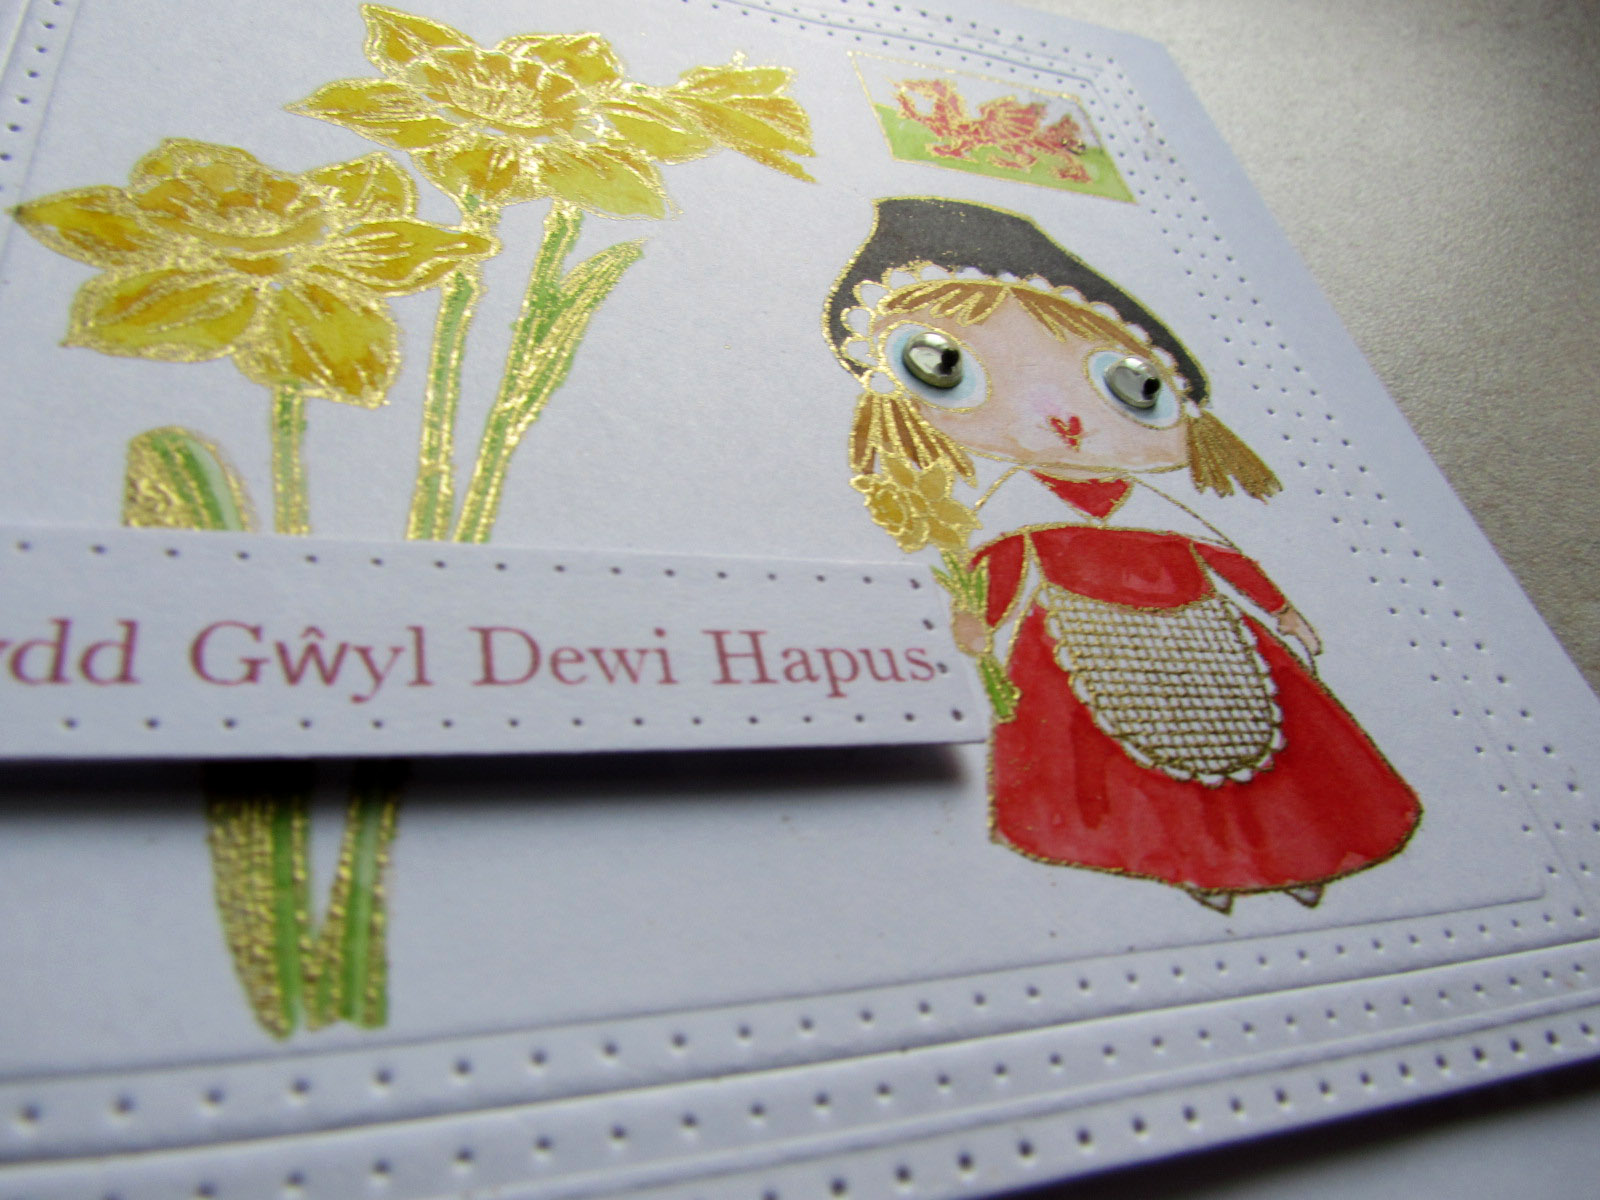
It's March, and it starts with St David's Day here in Wales, so of course it had to be that theme. I was lucky enough to buy the stamp set after Christmas, at a reduced price. I brought in another stamp set of daffodils, and arranged them with the flag and Miss Wales, as I call her. I thought they looked best on a square card, so I die cut a square and, inside that, I embossed using a smaller die. 

The images were placed onto the square and stamped. I embossed in gold, so the daffs shone, I've attached a closeup so you can see it, I think it would have been better stamped in black, all done now, maybe next time? I coloured the flag and Miss Wales, she was coloured with DI's in the same colours as I wore in 1981, below. The hat wasn't black enough, so I went over it with a marker. I added wobbly eyes, as I had made a mess of the eyes!

As the 1st of March is St David's Day, I decided to write Happy St David's Day, in Welsh, on the computer and print it out, it was then die cut and placed with 3D pads.

Welsh stamps - Wales AALL & Create
daffodil stamp - Magazine freebie SCP#240
inks - Distress Inks tattered lace, tea dye,fossilized amber,scattered straw,mustard seed,barn door,fired brick,twisted citron,mowed lawn,gathered twigs,black soot
marker - Spectrum Noir 
wobbly eyes - stash
dies - Sue Wilson Noble square dies

 a close up of the gold embossing


me in Welsh National costume, only a couple of years ago, ahem  in 1981.

here's a link to the photo post, if you are interested?
 

 Don't forget, your image must be hand coloured. We now require At least one stamped element on entries. Those of you like us, who love to stamp, we would still love you to enter your fully stamped entry.


  Important - Please read the updated Rules of the Challenge Here


Our prizes this month are - Two Spring themed Penny Black stamp sets from Buddly Crafts

01 March 2025

Spring Happiness CCC


     Hi Everyone, my DT card today is for -

Critter Crazy

Whether Furry, Feathered, Fantasy, Fairytale, 
Scaly, or Insect, there must be a critter.
 
The title of my post today is very apt, as Critter Crazy Challenge has been saved by the marvellous Becca Sadler, who also has other wonderful challenges to follow. 

I saw this digital stamp in a sale and had to have it, so cute, and I could use it for a friend. I took it into Silhouette and cut 3 images. Then stuck for a design, I looked at a few sketches I have saved and found this.
  
I looked for paper to use with it, and as it's St Davids Day today, I used this daffodil paper, from 2017. Using DI's I coloured the image to match and attached the 3 layers. Next I die cut a square of yellow card and white which was slightly smaller, onto which I blended green and blue to make a simple background for the image, which was added to it. I also added 3D glaze to the eyes and nose.

A die cut a circle of the yellow card, that also surrounds the main image, and a white circle of the next size up which was blended to match. The daffodil paper was added to another piece of the yellow card. All then added to the base card.

digi stamp - Di's Digis, Spring Happiness 
inks - Distress Inks, dried marigold, fossilized amber, wild honey, tea dye, brushed corduroy, antique linen, old paper, shabby shutter, bundled sage
sentiment stamp - Spring Florals SCP#226
paper - Daffodil Cheerfulness, The Lovely Studio (Pink Petticoat as was)
 card - Lidl
3D glaze - Nuvo Crystal Glaze 
 

I hope to see you at the Critter Crazy Challenge which as I said is continuing under the guidance of Becca Sadler. Whoop Whoop
 
A Happy St Davids Day