29 May 2022

Witch Post it / Halloween?

 Hi Everyone, I have been a bystander in a challenge for a long time, just lovin' the humour and not being able to put anything together, but today I managed it. Just about! Must be my thing?

Anyhow I have had this post it template in my files since 2009 and have finally used it. I took the template into my die cutting machine and had to play about with the image as it didn't have any lines to cut with, (for my machine to cut it). So after adding, taking away and lots of other things, I came up with this, I also added layers which weren't in the original image. I didn't colour her face, I don't think Witches have any colour? although I have seen some, this lady didn't!

I cut out all the parts, (as in die cutting) I went around the edges with black marker pen. I also cut a headband layer with textured card. The sentiment was cut out with 2 other layers to give it depth. I added the hat with 3D pads, then coloured her lips in markers. The note pad was attached inside and I now have a fun post it in my handbag to write things in. (It's very simple, but I didn't want lots on it in my bag.)

template - no idea! it's from 2009
markers - Spectrum Noir
sentiment - found on web
spotted dp -  Sissix
card - stash

 
I just realised my note book image is similar to the badge! Oops! and she is coloured!

23 May 2022

Quick say cheese!

 Hi everyone, my card today was for my lovely youngest brother who was 74 yesterday, a retired professional photographer, I always try to include something to do with photography or his beloved cat. This birthday, I again, decided on photography and was lucky to see this fabulous image, which I though was perfect for him. I made a comment on Lee's blog and she kindly sent me a few different stamped images I could colour. This was the one I commented on.

I coloured the image with DI's and then measured the size of the image. I sized a film frame  in my Silhouette, and decided to do a fold card with the fold shape based on a card I had done before. I added some photos of my brother and a film strip and backing for the photos. Then cut, folded, glued, attached and finished off with a computer generated quote I made up, I thought it suited the mouse image on the front layer. I'm glad to say he appreciated it and enjoyed the laugh.

inks - Distress Inks
adapted fold - Lori Whitlock.
film strip and frame - Carin Grobe
 
this was taken under different light!
 
part of the whole card 

a better view?

House Mouse Challenge #366 Is the stamp recycled? If not an ATG

Allsorts Challenge #677 Anything for a birthday - Yep!

Kraftin' Kimmie Challenge #633 fun fold - hope so!

Inkspirational #264 something free or a gift? Yep! the HM image


by the way, anyone interested in a DT place?  I would love to, but haven't the time, fabulous files to make from here, I've used a lot in my makes.


21 May 2022

New Printer and Baby Girl

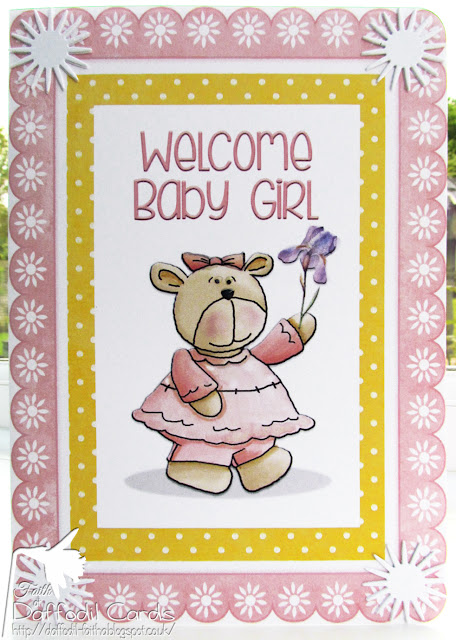
 Hi Everyone on 11th May at 9.30am a new Little girl was born into our family. My Great Niece delivered Iris Avril, a Sister to Dorothy and Owen, we are over the moon. They live 6 hours from us, so it will be a while before we see her, but we already feel we know her, with so many photos and videos of her sent to us.

Before I started on her Welcome card I hit a glitch while printing something else, my printer was making funny noises, wouldn't feed the card or heavy paper, so I tried copy paper, same thing! Noooooooo! 

Anyhow to cut a long story short, I had to buy a new printer. That is an ordeal in itself. Which do I buy? I have been looking and doing research for a couple of years in anticipation of this happening. However, I decided to buy an Epsom ET-2850, after querying with them if the printer would take 300gsm card. Well? it does and it doesn't, if I have it on borderless it won't, so I have to use it on an ordinary setting, also on Custom settings it won't do borderless. I love the print quality though and will be able to work around it. It's a shame I have to though, as my old printer did custom settings beautifully. I will miss my old printer who worked it's socks off for me over the many years I've had it. It really was an old friend.

Enough of that silliness, now the card for our sweet new baby. I found this lovely baby bear and looked for an Iris flower image in my files to add to her. I cut the lollipop she had in her hand and added an Iris flower. Also in my search this floral frame came up, it has a sunny flower, so I added that too, some brightness with the yellow spot paper and a cute font title and sentiment. I die cut some flowers that I thought matched the flowers around the card and
added sparkle pen to their centres and the bear's dress and 3D glaze to her eyes and nose. A simple card, only because I was so worked up about the printer, I couldn't think of anything else but printing!!!
Lil Bears - Trina Clark (2008)
flower die - Card Making Magic
frame and spot paper - Julie J (2008)
font - KG Beneath Your Beautiful Chunk
Iris image - Creative Fabrica
sparkle pen - Spectrum Noir Clear sparkle pen
3D glaze - Nuvo Crystal Glaze.
 
 
 this is the insert, I added another iris flower behind the teddy flower girl
 

This is a photo of the family the day they got home, Mum is very sore after the caesarean, Dorothy 4 and Owen 2 have fallen madly in love with her. I did a scrapbook page for her. I chose the papers to match her bedroom colours and what they were wearing, not typically new baby colours, but I think it works?
template - Marisa Lerin #38
dp's  Billie Irene Digital Scrapbooking (PixelScrapper)


18 May 2022

Quick makes? catch up

 Hi Everyone, I was looking through my photographs and realised I hadn't shown you what I did before Christmas I also found a more to show you I hadn't done so before.

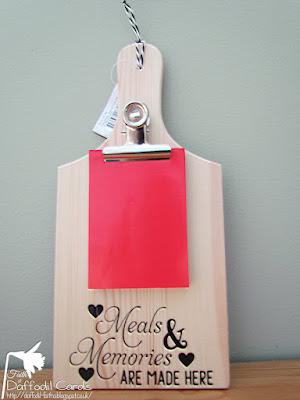
This was a present and something I had wanted to do for a long time, after seeing an inspirational blog post from Janette here, she had said where to get the board from and I ordered it that day. I bought a pack of large Bull Clips and a few months later, I got to make it! Yep! a few months! by then I had forgotten where I had seen it and the inspiration of painting the board I had seen. Too late for me to make it more interesting, but I screwed the bull clip on, added a tie to hang it on then grabbed some black vinyl, I went to my die cutting machine, and cut the words. I then placed them onto the board, after making sure I added them under the note pads I had bought for it. 

Something else I made before Christmas, as it was needed on the 5th January - my #3 brother's birthday card. I know I was up to my neck in things, with no mojo and a complete loss as what to do. I spent more time thinking about it than making this card. I wanted a quick card, but one that was special to him, luckily for me a freebie popped up in my mail and it was perfect for him. It also had a saying on it my SiL says to him when they go out, so it was meant to be. My Silhouette is becoming more handy to me than Photoshop surprisingly, after all these years. I took it into the die cutting machine and resized the card to 6 x 6 instead of the 8 x 8 it is supposed to be. I then cut all the layers out and layered them together adding them to the 6 x 6 card. 

"It's an age thing" digital card from CraftsUPrint Crafty Bob freebie 
by Elaine Hayhoe

 Another card not posted here and again a quick make for a birthday I had forgotten after my diary failure. It had to be made to go into the post that day. I used an image I used years ago, I added a wall background and a brick pavement then a die cut flower, in my mind a dandelion weed coming out of the pavement (sidewalk). Thank goodness for Photoshop! That's not what I said earlier though is it? 


 Thanks for sticking with me through this catch up post here today. I'll try and keep up to date and show more recent makes in future 😁

Have a great day and I hope you are all well too.


15 May 2022

Bumble Bee QKR

 Hi Everyone my DT card for today is for the challenge at QKR. Our challenge is on the 1st and 15th of every month, so you have 2 chances every month to enter the challenge.

We will select two winners each of the weeks 
1 using QKR Stampede  or Eureka Stamps image
 and 1 using any image!

Anything Goes every 1st & 15th of the month

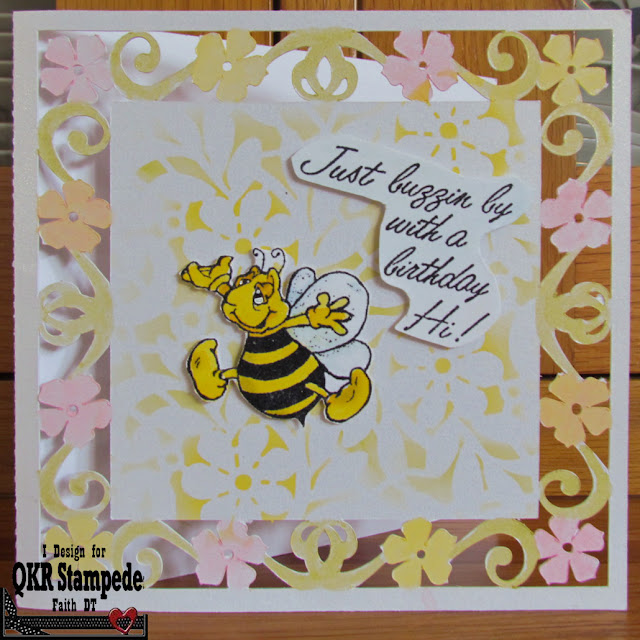
I was looking through by bits box and came across this wonderful cut file card I hadn't used, it was perfect for what I wanted. I got out my Distress Oxides and coloured the flowers and swirls, then found a floral stencil that was given to me a few years ago and coloured the flowers yellow and the leaves green, shame is as the card is pearlised and the colours don't come out in the photo, due to the shine of the card. 

I then stamped the bee and sentiment and fussy cut around them. I coloured the bee with DI's and 3D'd them onto the stencilled part of the card. The wings and sentiment were lightly coloured too.

Distress Oxides - Mustard Seed, Squeezed Lemon, Kitsch Flamingo, Peeled Paint.
wings and sentiment - Distress Inks - Tumbled Glass  
flower card cut file - Krewella Creations. I had it in 2012
 

Creative Moments Challenge #234 Summer's Here? Yep! I think so

Global Design Project #343 Beautiful Bugs. He's cute?

12 May 2022

Little things?

 Hi Everyone, I hope you are all well, thanks for joining me. My card today was a chance make. I was in my Silhouette files and the picture of the file hadn't downloaded properly and was showing half the image, this is what I saw - 

 this is what it should have looked like
  
 
However I saw it as a card with just the half image and that is what I have made today. I used the whole flower image and added a 11 inch by 2.5 inch strip, I joined the flower image to the strip and I had my shaped card! 

I then searched for dandelion papers in my files and came up trumps with this lovely one I have had since 2013. After printing, I cut the paper to size for the front of the card layering onto black paper. I coloured the little House-Mouse, sent to me by Lee, who asked if I wanted some images after I had commented on one of her cards, I was over the moon to say yes, so thanks again Lee. I also have others, that she sent, that I shall be using asap.

After colouring I die cut the image and a shadow layer, matching the paper. I decided as he is such a simple image I would pretty the card up a bit, to show him off more, I couldn't do CAS, sorry. I coloured the flower part of the card and add die cut flowers, colouring the centres to the shape. I computer generated the sentiment on the insert and printed it out.  For a card I didn't know I was going to do, it turned out quite well I think? It already has someone I know who will receive it.

Mum flower  - Jennifer Wambach Silhouette Design store
mouse image - House-Mouse stamp from Lee
dp - "Dandelion Clocks" Pink Petticoat (now The Lovely Studio) 
inks - Distress Ink, squeezed lemonade, mustard seed, brushed corduroy, tea dye
flower die - Tattered Lace
this is the insert
 
House Mouse Challenge #365  A flower but not a rose sadly!

Cut It Up Challenge #251

On a different subject, I did at least 20 or more comments last night and Blogger said "Publishing" in a large black rectangle, but the comment stayed there. I left them and went back to each one and the comment was still there, so I repeated this process at least 5 times on each one. SO! If you have had many comments saying the same thing, I'm sorry, if you haven't had any, I promise I made them! If I have time I will try again today or tomorrow.

08 May 2022

Wake up birthday card

 Hi Everyone, I thought I would show you the birthday card I made for my hubby in April this year, trouble is, I used the same image last year here, but it was from my son OOPS! It must be old age! At least it was different colours and design. I wonder if it has something to do with his slipping off to sleep in the evenings and the day sometimes comes to that, I must be working him too hard perhaps! It's all the garden and new path, poor man. Funny thing is he didn't notice, whew? I asked him a couple of days later if her realised, a negative response makes me think maybe I can use it again next year hahahaha

digital stamp - "Retired" Ericraftstamps  
inks - Distress Inks
digital paper -  Gina Jane
blue card - stash
sentiment generated in Silhouette and cut with a shadow to follow shape of words


07 May 2022

How to digitally paper piece

 Hi Everyone, I have had a couple of you ask how I digitally paper piece? So I thought I would show you. I use Photoshop CC  23.2.1 Release and DeeDee's Digis digital stamp, I'm afraid DeeDee's Digis digital stamps are no longer trading.

  • Firstly I select the part of the image I want with the "magic selection tool" this produces "marching ants" as below. Sorry their too fine for you to see, but I promise they ARE there.

  • I copy the piece selected with the marching ants and then paste


  •  here I have coloured the layer so you can see where I pasted the layer


  • I add the plaid layer


  • Now I link the plaid to the shorts layer


  •  Now it's shading the plaid layer as you would with colouring or painting.


I haven't talked about the tools or shortcuts I used ie Ctrl A and Ctrl V etc, If you would like to know. Please contact me by email if you prefer. I am more than willing to let you know. It's a very quick and easy process.

I shall also add this onto a Page on my Header, I hope it helps you understand how to layer, also you don't have to remember where this post is.

04 May 2022

Sports TMR

 Hi Everyone, my DT post today is for 

The Male Room challenge #162 

I have had "Derek" in my files for too long! it was time to use him and for the perfect challenge. I took him into Photoshop as I wanted to add a plaid paper for his shorts, digitally paper piecing. I print and cut him (so easy) in my Silhouette using a border cut, maybe a little to large? After the 4 layers were cut I coloured him in watercolour pencils. I didn't think his glasses stood out enough, so added a fine liner black pen to make them stand out. Then added 3D glaze.

I stamped the sentiment onto white card and sports items onto another piece of card, clear heat embossing them, there are dumbbells and weights on it, but with my cutting and placement you can only see the skipping ropes oh! well. 

I die cut the border coloured card, stamped, fussy cut and added the weights in the corner. I could have added more details but thought the men don't see the extras, so left it quite simple. I could call this card mixed media?

DumbBell Derek - Dr Digi
watercolour pencils - Nuvo Water Colour Pencils
shorts paper - Gina Jones
card - Craft Sensations, Lidl, Crafters Companion 
stamps - Magazine Freebies
dies - Sue Wilson Noble dies
 
EDIT : 
I'm thrilled to say I was chosen as card of the week by Dr Digi 


01 May 2022

Another year older! Critter Crazy

  Hi Everyone, I have 2 DT cards today, this is for -


Anything Goes but they MUST feature a critter as the main focus
Whether Furry, Feathered, Fantasy, Fairytale, 
Scaly, or Insect, there must be a critter...
 
I have had this set of stamps a while, and have been picking up courage to colour these fab goats. I eventually did it with watercolour pencils for the goats, pencil strokes for the grass and some shading around the die cut frame. The sentiment was stamped and I added a green card border for it and the goats, I thought to tie in with the grass? I die cut a few flower heads and added them. Quite a simple card which I am happy with.
 
stamps - Woodware 
square die - Sue Wilson Noble square dies
watercolour pencils - Nuvo
flower die - Tattered Lace 
shading - Distress Inks
 

Allsorts Challenge #674  Option of "Scenic" - maybe?


Fig-ured QKR

 Hi Everyone I have 2 DT cards for today

This is for the challenge at QKR. Our challenge is on the 1st and 15th of every month, so you have 2 chances every month to enter the challenge.

We will select two winners each of the weeks 
1 using QKR Stampede  or Eureka Stamps image
 and 1 using any image!

Anything Goes every 1st & 15th of the month
 
I had an idea and used this image to try and see if I could do it, I'm glad I did, as it wasn't as hard as I remembered. 
 
I  took the digital stamp image into Photoshop, digitally coloured it and made a pattern paper for the background, being pleased I hadn't forgotten how, I haven't done it for many years. I printed the pattern layer and the darker bottom layer, then added them to the card. 
 
I then took the smaller coloured pink square with the sentiment and the larger uncoloured fig on it, into my digital die cutting machine, sized it to fit the card, I made 4 layers of the whole image and 4 of the fig only, then printed and cut the images. I tried to copy the colours in a picture of a fig. I didn't realise they had so many colours in them. I coloured the stem, leaf and fig with DI's and then coloured one of the single fig images, glued all layers and attached them to the card.
 
I added die cut corners adding a cut out piece to the other corners. 

I have so many other puns to use for this image, it'll be fun for quite a while methinks. 
 
image - QKR Stampede
pattern paper - my own
Inks - Distress Inks 
seedless reserve, victorian velvet
abandoned coral, squeezed lemonade
die cut corners - Card Making Magic