Hi Everyone, this is a VERY photo heavy post, please just go to what you want to see, don't feel you have to see them all.
My make today started with the Craft Club. I had printed a digital file for the ladies to cut and layer. When I got home I had a call to let me know that another one of the members had a birthday and could I make a card for her. Not being in a card making mood, I took the main image, made it smaller and left out a few images that were included in the digital file. I used my Silhouette to cut around the images and layer them. I Die cut and stamped a sentiment and voila, so to speak, a card was done for her, she isn't attending for a week or two so wouldn't have used the print out.
I then had another phone call later in the evening, to ask me to do a second card for one of the members who had fallen, who again hadn't attended that day and as I had the file in use, I decided to do another, but slightly different as a get well card, they wouldn't see each others cards, so again I print and cut with layers on my Silhouette. What I couldn't get over was the difference in printing colour from one to another, the original club cards and the first card were the same, the second card came out a much darker colour, I liked it so carried on with doing it. Although I had to take a photo of them to show you. I hadn't made any changes to the print settings! I wonder if my printer is telling me something?
card number 1
card number 2

showing them side by side
this is the card image and file
from CraftsUPrint.com
Also used were
stamp and die - Julie Hickey
Silhouette print and cut
I told you this post is picture heavy, are your ready? Here goes.
For many years the top of the garden has been neglected, it had the old conifers, that had died. After we had the wall put in, we or rather hubby had a lot of digging to do, at 79 this month it hasn't been easy, but at last, this last weekend we were able to buy shrubs, sadly not big ones, we are hoping we'll see them get larger hahaha. They were planted and a new foot path then had to be added to connect to the new planting. This is the process so far and I am thrilled to see it all nearly finished, for me it completes the garden.
this is part of the
BEFORE
the new path in process
meeting the new planting of shrubs
blocks found under the earth, placed against the compost heap,
with a small wall erected to hold back the earth.
the left side of the garden, showing the veg garden already dug,
with potatoes, carrots and lettuce already in. The wires ready for the
Runner Beans and posts for the butterfly netting to protect the carrots from carrot fly.
these are HUGE stones that had been found in the garden previously, they were made into a rock garden! A few rock plants needed here, a good excuse to buy more plants!
the right side top border with new shrubs and a few hyacinths past flowering indoors
in their new home, a few more things to fill this methinks. We are not sure if the hypericum has died on replanting or will come. The Nandina was placed there just in case, it may be wanting a new home if they come.
the right side of the garden with the new narrower border, again all new plants, except the pittosporum, the tulips have been lovely this year.
the patio border with another show of tulips and the rose with lots of new grow.
Beautiful Camelia
A start to the Cherry Blossom Tree, I hope the rest of the tree waits until
this frost and chill wind is over before it comes out.
beautiful Rosemary flowers
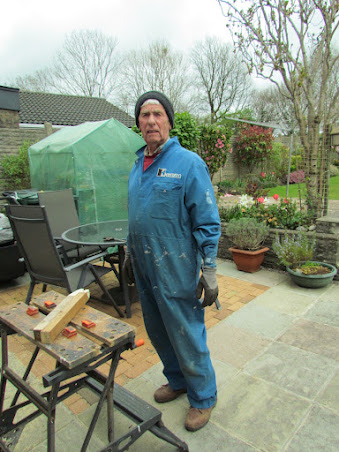
This is my HERO!
who works very hard to keep the garden looking so neat.
He's wrapped in lots of layers to keep the really cold wind out,
while he cuts the wood edging to the path. The overalls are years and years old, he has 3 new ones indoors, but won't change it! I threaten to cut it so he can't use it again. hahaha


